
We walk you through sizing, permits and realistic costs so your steel hangar fits the aircraft you fly today and the one you'll want tomorrow. Our pre-engineered systems go up fast, shrug off weather and keep lifecycle costs low, turning steel into the smartest hangar investment you can bolt together.
Why Metal Hangars Are the Smart Choice for Aircraft Owners
Metal hangars eliminate interior posts so your aircraft maneuvers freely, and galvanized steel frames require minimal maintenance while resisting corrosion for decades.
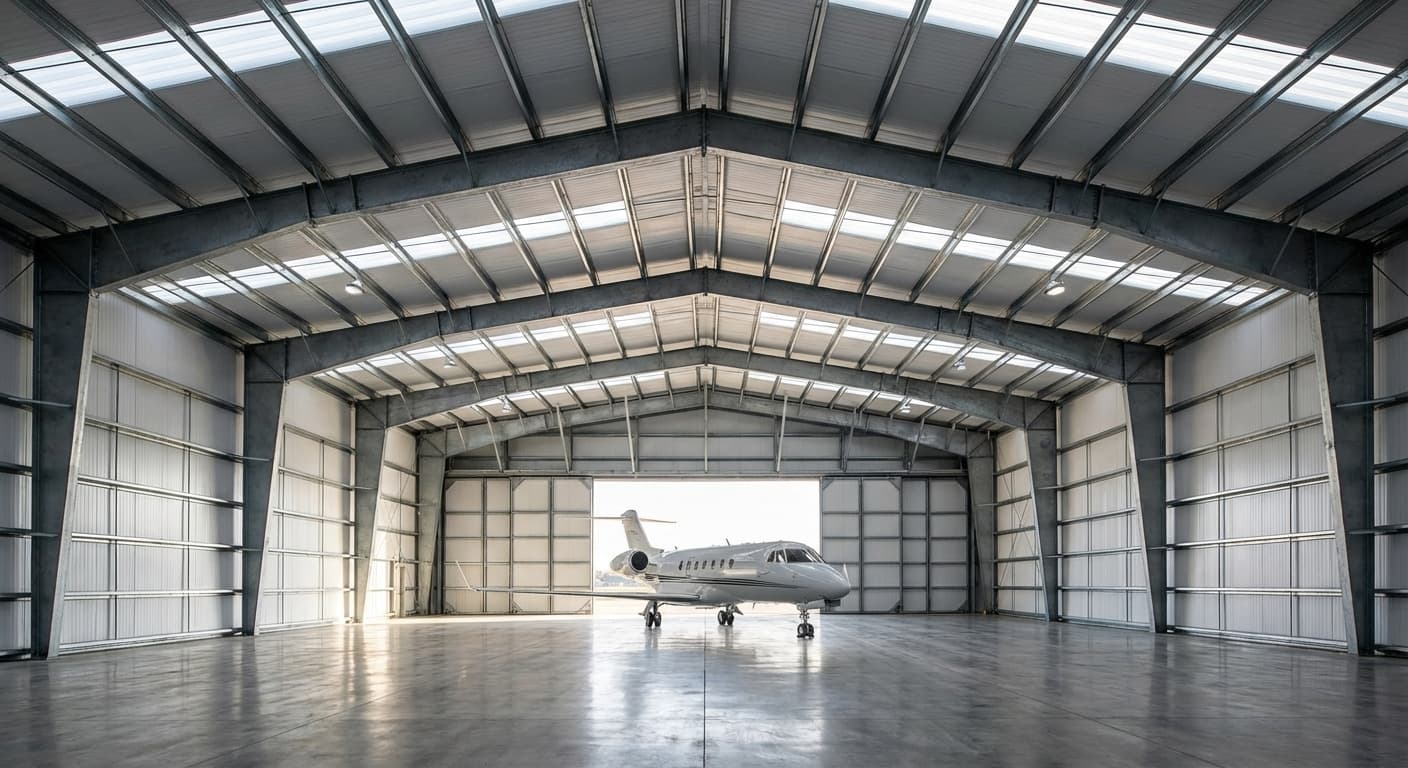
Clear-span design eliminates interior columns to protect wings and tails
Working with metal makes it easy to create a large open space–exactly what is required for this type of building. The absence of interior posts means you can maneuver the aircraft without worrying about clipping a wingtip or tail on a column, saving both stress and repair dollars every time you tow.
Pre-engineered steel frames can span 100 feet or more without intermediate supports, so even a twin-jet with a 60-foot wingspan glides in with room to spare. The unobstructed bay also gives you freedom to install wider bi-fold doors, position workbenches along the walls, or stack avionics cabinets without playing a perpetual game of clearance chess.
Low-maintenance steel outlasts wood and fabric in harsh climates
Quality metal structures can last for many years and need very little maintenance, freeing you to focus on the aircraft instead of the building. Galvanized primary and secondary members shrug off rain, UV, and the chemical residue common around fuel and hydraulic fluid, so you won't face the rot, warping or pest issues that plague wood-frame hangars.
Steel skins arrive pre-coated with high-performance paint systems that carry 25- to 40-year warranties against chalking and fade, eliminating the annual scraping and repainting demanded by wood or fabric coverings. In coastal or high-humidity regions, cold-formed galvanized framing offers an extra layer of corrosion defense, keeping lifecycle costs low while protecting an asset worth far more than the hangar itself.
Fast factory fabrication slashes weeks off build schedules
Every purlin, girt, and tapered beam is cut, punched, and welded under factory quality controls, then shipped as a kit that assembles like a life-size erector set. Because components arrive ready to bolt together, a seasoned crew can raise a 60-by-60-foot hangar in a matter of days, not weeks, minimizing downtime at busy airports.
The predictable timeline also simplifies coordination with concrete contractors, electricians, and door installers, so you're not paying for idle labor while waiting on custom-cut lumber or field welding. Faster erection translates directly to lower interim financing costs and quicker revenue generation if you plan to lease extra bays, giving steel a financial edge before the first aircraft is even pushed inside.
Sizing Your Hangar: From Single-Engine to Twin-Jet Requirements
Add four to six feet of wing-tip buffer on each side and eight to ten feet of vertical clearance to prevent costly strikes during towing and maintenance.
Add 4 ft minimum wing-tip buffer on each side for safe towing
You always want extra room on all sides so bringing the plane in and out is not a stressful experience. A four-foot wing-tip buffer on each side is the absolute minimum for safe towing, and six feet is better if you share the hangar with another aircraft or plan to perform routine maintenance inside. That cushion lets a wing-walker guide the aircraft without forcing the tug driver to inch along at a crawl, and it keeps tools, workbenches, and door tracks from becoming expensive obstacles.
Measure the published wingspan, then add the buffer twice–once for each side–before you lock the building width into the foundation drawing. Remember that even a Cessna 172's 36-foot span becomes 44 feet with a modest four-foot clearance, and a Baron pushes past 50 feet. Factor in the tug turning radius as well; a tight column spacing can leave the nose gear cocked at an angle that stresses the towbar and slows ground ops.
If you operate on a crowded ramp, consider a 50-foot width for single-engine aircraft so you can park slightly off-center and still open the cabin door fully. Wider bays also give you room for folding work tables, compressor hoses, and a small parts washer without turning the floor into an obstacle course. The extra steel is cheap compared to the cost of a wingtip strike or the headache of re-ordering a new door size because the first one was too narrow.
Plan 8-10 ft tail clearance plus antenna/ADS-B height allowances
Tail height is easy to overlook until the first time you raise the elevator and hear fiberglass kiss a rafter. Give yourself eight feet of clearance above the highest point of the empennage; ten is smarter if you fly anything with a T-tail or plan to install a vent-mounted avionics antenna later. ADS-B Out whip antennas often add another 18 inches, and forgetting that detail can force you to remove the unit every time you push the airplane inside.
Check the POH for the aircraft's maximum tail height on level ground, then add the cushion and compare that number to the hangar's eave height. Keep in mind that a sloped apron can tilt the airplane several inches nose-down, effectively raising the tail closer to the roofline. If your field sees snow, remember that a drift against the door can reduce the effective opening height by a foot or more.
High-clearance bi-fold doors solve most of these issues, but they still need a minimum header depth. Ask the door manufacturer for the exact closed-height dimension and add two inches for seal compression. A little math now prevents the expensive sight of a rudder fabric tear or a bent antenna after the first winter storm.
Design for future upgrades: wider bifold doors and deeper bays
Build for the airplane you want, not just the one you have. A standard 40-foot-deep T-hangar fits most four-seat singles, yet a future Bonanza, Cirrus or light twin will thank you for 42 or 44 feet of length. The extra steel is a fraction of the overall project cost, and it eliminates the day you have to choose between leaving the towbar attached or parking with the spinner kissing the back wall.
Door width follows the same rule of thumb: size for a 12-foot wider wingspan than your current ride. A 46-foot opening handles everything up to a turbo Saratoga, while a 50-foot opening swallows a Citation Mustang without folding wings. Hydraulic bi-fold units can be field-modified for taller or wider leaves, but the building frame has to be engineered for the added weight from day one.
Finally, think about what else the hangar might house: a second aircraft share, a flight-school leaseback, or a small shop bay separated by a firewall. Extra depth lets you park tail-dragger style with the fuselage angled, gaining clearance for both wingtips. A modest bump in width and depth today keeps you from pouring a second slab or extending sidewalls when the upgrade bug bites.
Navigating Permits, Zoning and Airport Authority Rules
File FAA Form 7460-1 early–the 45-to-90-day review window is critical, and local snow loads or wind exposure can require costly steel redesigns if you skip the load sheet first.
Secure FAA Form 7460-1 for any structure near controlled airspace
Before a single footing is poured, the FAA needs to know your hangar exists. Form 7460-1, the Notice of Proposed Construction or Alteration, is mandatory when any part of the structure penetrates an airport's imaginary surfaces or sits within controlled airspace. Miss this step and you risk a stop-work order, a five-figure fine, and the embarrassing spectacle of dismantling steel you just paid to erect. File early; the review can take 45-90 days and the tower will circulate your plans to every airline, med-evac operator, and crop-duster that uses the field.
The form demands exact GPS coordinates, finished height to the nearest foot, and the type of roof–because a 1:40 glide slope calculation can make the difference between approval and a forced redesign. If you're within 20,000 feet of a public-use runway, assume you need it; even a modest 40-foot eave triggers scrutiny when the approach path is nearby. Keep a stamped copy on site during construction; an FAA ramp check can happen any time the windsock is limp.
One overlooked detail: lighting. A hangar tall enough to require Form 7460-1 may also need obstruction lights, and the FAA will tell you the color, flash rate, and lux level. Budget another $2-4k for the beacon and a photo-cell controller; it's cheaper to install it now than to rent a crane later.
Check local snow, wind and seismic loads that govern steel gauge
County engineers love to see metal buildings until they realize you sized the frame for Arizona loads in a Colorado county that sees 90 psf ground snow. Local amendments override the IBC, and the hangar you priced with 14-gauge purlins suddenly needs 12-gauge and a 4:12 roof pitch to shed drifting snow. Ask for the load sheet before you order; suppliers will recalculate for free, but changing steel after it's on a truck gets expensive.
Wind exposure is trickier. A rural strip with 120-mph design winds and open terrain (Exposure C) can add 30% more bracing than the same building tucked behind a tree line (Exposure B). If the airport sits on a plateau, ask about topographic factor Kzt; a 20-foot rise can spike pressures enough to bump the primary frame from a 26-pound section to 35-pound. Seismic zones add another wrinkle–hangars near the New Madrid or San Andreas faults require special anchor bolt embedment and moment connections that can add $3-5 per square foot.
The takeaway: get the stamped structural letter from the local building department and send it to your steel vendor on day one. It saves the awkward phone call that begins, "We can't permit this as drawn."
Obtain airport hangar-use agreements before breaking ground
Most airports won't let you build on raw land; they lease the footprint through a hangar-use or ground-lease agreement that spells out everything from fire-suppression requirements to who paints the taxiway stripes. Read the fine print: some leases cap the square footage of "non-aeronautical" storage, so that workshop bench for your golf cart could violate the lease. Term matters too–30 years may outlast the mortgage on your steel, but shorter leases can crater resale value if a buyer's lender balks at collateral that disappears in 15.
Insurance is another gotcha. The airport may demand $5-10 million in liability coverage and name the municipality as an additional insured, quadrupling your annual premium. Some FBOs also require proof that your steel supplier carries a performance bond; if the hangar kit shows up missing parts, the bond pays to finish the building so the airport isn't staring at half a frame.
Finally, get the signature before you order concrete. A lease contingent on airport board approval can take 60 days, and custom-steel lead times move faster than municipal politics. Start the paperwork the same week you file Form 7460-1; by the time the FAA clears your height, the board meeting agenda will have your name on it.
Budget Reality Check: Material, Labor and Hidden Costs
Bi-fold doors recover their $8-$11 per square foot premium in under five years through heating savings, while slider maintenance costs can erase initial savings over 20 years.
Factor bi-fold vs. sliding door hydraulics into lifetime OPEX Bi-fold doors add $18-$25 per square foot of opening against $10-$14 for bottom-rolling sliders, but the comparison shouldn't stop at purchase price. Hydraulics cycle in 45 seconds and seal tight, cutting annual heat loss by 25-30 % in cold-climate hangars–enough to recover the premium in under five years if you condition the space.
Sliders demand less upfront cash and fewer moving parts, yet every winter they cost you: snow builds on the track, wheels flat-spot, and a single frozen bearing can ground you until a tech arrives. Budget one service call per 200 cycles at $350 a visit, plus the tow-behind heater rental while you wait. Over a 20-year life, the maintenance delta can erase the original savings.
Budget for slab thickness upgrades to handle loaded aircraft point loads
A standard 5-in. slab rated for 3,000 psi works for cars and pickups, but a fully fueled twin turboprop can drop 9,500 lb on each main gear. Upgrading to 6-7 in. with #5 rebar on 12-in. centers adds roughly $1.10 per square foot, yet prevents the spider-web cracks that trigger FOD concerns and costly resurfacing.
Don't forget the thickened edge footings where the door track anchors. Spec a 12-in. wide x 18-in. deep keyway under the rail and you'll stop the hairline cracks that migrate across the floor every time the door slams. The extra yard of concrete is cheap insurance against a $15,000 slab replacement that shuts your hangar down for a week.
Final Walk-Through: Handoff, Maintenance and Long-Term Value
Document every gap with dated photos before final payment to unlock your one-time seal touch-up window and preserve your warranty coverage.
Inspect door seal gaps and drainage to prevent corrosion hotspots
Before the crew leaves, walk the slab edge and note every place daylight shows under the bottom rail; a credit-card-thick gap is enough to let driven rain creep back to the column base plates. Pay special attention to the door jamb where the track meets the header–if the seal strip is kinked or short by even a quarter-inch, condensation drips straight onto the hinge pins and starts rust bloom within weeks.
Run a hose on the roof for ten minutes and watch where the water exits; puddles that linger longer than thirty minutes indicate a compromised crown or missing gutter strap. Those shallow ponds evaporate slowly, raise humidity inside the hangar, and turn the lower chord of the truss into a corrosion hotspot that won't show up until your first five-year appraisal.
End cap flashing on the base channels should lap the concrete at least an inch and be sealed with polyurethane, not butyl tape that dries out. If you spot white salt stains on the slab face, the steel is already wicking alkaline moisture upward–catch it now and you'll avoid a $3,000 sand-blast and re-coat later.
Document every gap with a dated photo; most erection contracts allow a one-time seal touch-up within thirty days, but only if you flag the spots before final payment is released. A ten-minute inspection today buys you a decade of rust-free service life and keeps your warranty intact.
Create quarterly lubrication schedules for tracks and hinges
Bi-fold doors ride on bronze bushings that see 300% more cycles than an industrial roll-up, so grease them with lithium complex every ninety days–not when they start squeaking. Spray a light coat on the chain, wipe the rail with a dry cloth, then cycle the door twice; the steel-on-steel contact should feel slick, not tacky, or you'll score the track and pay for a $1,200 weld repair.
Sliding hangar doors collect fine grit on the lower roller guides; blast the track with compressed air first, then run a bead of silicone along the flange to keep dust from packing into the bearing race. Mark your calendar the same week your aircraft oil is changed–pairing the two maintenance tasks ensures neither gets forgotten.
Keep a pint-sized grease gun labeled "Hangar Only" hanging on the pilot-room wall; shared shop tools tend to walk away, and a dry hinge pin will gall overnight in coastal air. One missed quarter turns into a seized roller, a warped door panel, and a service call that costs more than the airplane's annual inspection.
Log every lube date in a simple spreadsheet: hours on the door counter, ambient temp, and product used. The resale packet that shows disciplined upkeep routinely adds 3-5% to the building's appraised value because buyers know they won't inherit deferred maintenance.
Quality metal structures can last for many years and need very little maintenance–as long as you treat them to a fifteen-minute quarterly ritual. Skip it and the same steel that shrugged off hail will quietly rust where no one sees until the door hangs up on a Sunday morning departure.
Document load ratings for resale and insurance premium reductions
Ask the erector for the sealed engineering letter that states design loads–live, wind, collateral, and point load at the door header–and file it with your aircraft logs. When the next buyer's bank appraiser sees a 140-mph wind rating on paper, the building moves from "standard outbuilding" to "engineered aviation structure," often worth an extra $8-10 per square foot.
Insurers like firms that can prove the hangar meets local code plus FAA Advisory Circular 150/5390-1; email them a PDF of the stamped plans and you can shave 8-12% off the hull premium because the underwriter knows a storm event won't total both the building and the airplane inside.
Take photos of the data plates on the door motor and rail stamps; replacement parts are specific to the series, and having those part numbers visible shortens downtime after a lightning strike. A well-documented parts list stapled to the electrical panel signals to future owners that this isn't a generic shed–it's a turnkey aircraft shelter with traceable components.
Finally, save the original concrete ticket showing 4,000-psi pour with fiber mesh; if you ever expand the hangar or sell to a corporate flight department, that slab certification eliminates the need for core drilling and structural review, cutting weeks off their build timeline and adding real dollars to your asking price.
- File FAA Form 7460-1 early; skip it and risk fines or teardown orders.
- Size hangar for wingspan + 12 ft door width to avoid costly future rebuilds.
- Upgrading slab to 6-7 in. with #5 rebar prevents FOD cracks from heavy aircraft.
- Bi-fold doors cost more upfront but save 25-30 % HVAC costs and outperform sliders.
- Seal every rail gap and flashings now to stop rust that voids warranties later.
- Log quarterly lube cycles; proof of upkeep adds 3-5 % to resale value.
- Keep stamped engineering letter and concrete ticket to speed sales and cut buyer delays.