
Choosing the right steel shed kit means matching a pre-engineered, code-certified package of 12-14 gauge galvanized components to your exact purpose, site conditions, and future growth, then customizing size, doors, insulation, and finishes so the building assembles quickly, costs 30-50 % less than wood or concrete, and delivers decades of low-maintenance service with warranties up to 50 years. Readers will learn how to translate intended use into clear-span dimensions and height, select frame and panel gauges and protective coatings for local wind, snow, and seismic loads, compare foundation options from slabs to piers, and decide between DIY or professional installation while avoiding hidden expenses like permits, utilities, and site prep. The article shows how smart orientation, drainage, and insulation slash energy bills and condensation, why certified steel earns faster permits and lower insurance, and what questions expose suppliers who cut corners, ensuring the shed goes up on schedule, expands easily, and recycles at end-of-life for maximum lifecycle value.
Understanding Steel Shed Kits
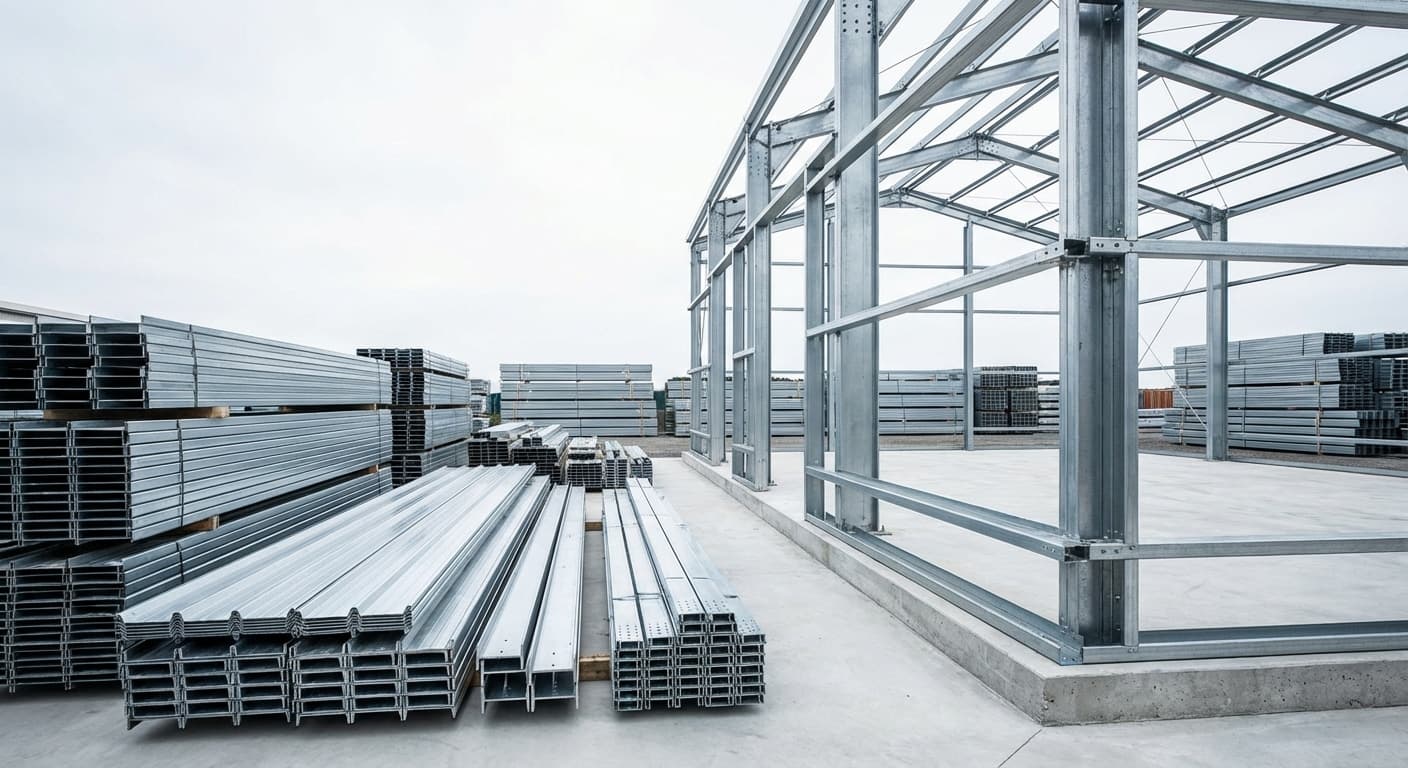
Steel shed kits arrive pre-engineered with galvanized components that resist rot and pests while saving you 30-50% on installation costs.
What are steel shed kits and how they differ from other metal building kits
Steel shed kits arrive as complete packages–panels, bolts, framework, instructions. Everything you need for assembly. You'll save 30-50% compared to hiring installers [1].
What sets them apart? Start with galvanized 12-14 gauge steel that outlasts other materials [2]. Add customization options for size, doors, and finishes. The result: a building that fits your exact needs.
Assembly requires basic construction skills–the pre-cut parts and clear instructions help you get it done right [3]. Unlike wood sheds that rot, warp, or attract termites, steel sheds stand strong year after year with minimal upkeep [2][3].
Core components and material grades commonly used
Your steel shed kit has two main parts: the frame and the panels. The frame–your building's skeleton–uses 12 or 14-gauge steel tubes engineered for your local wind and snow loads [4].
Panel selection matters (we'll cover specific gauges in detail in Key Selection Criteria). The basics: heavier gauge means stronger panels [4].
Look for these quality markers:
- ASTM-certified steel components (A36, A572, A992 standards) [5]
- MBMA certifications [6]
- Materials tested to ASTM International standards [6]
These certifications mean your shed meets building codes and stands up to whatever nature throws at it. When you work with
Benefits of steel shed kits for modern projects
You want results, not headaches. Steel shed kits deliver both ways.
Time and money saved: Pre-engineered components cut construction time in half. Labor costs drop. Your project finishes faster–and under budget [7].
Built to last: Steel shrugs off moisture, pests, and weather. No rot. No warping. No termite treatments. Just decades of reliable service [8].
Your design, your way: Need a specific size? Special doors? Unique finish? Steel kits adapt to your requirements without breaking the budget [9].
Green building done right: Steel contains recycled content and recycles again at end of life [7]. Tight manufacturing tolerances mean better-sealed buildings that cut energy bills when properly insulated [9].
Future-ready: Adding electrical, HVAC, or smart systems? Steel buildings accommodate upgrades easily. No major reconstruction needed [7].
The bottom line: You get a building that goes up fast, lasts long, and costs less to maintain than any wood alternative [8].
Recent industry standards and certifications
Your steel shed must meet local codes. Most areas follow the International Building Code (IBC), with local tweaks for regional challenges–hurricane winds in Florida, earthquakes in California [10].
Key certifications to verify:
- SFIA Code Compliance Certification–third-party verified through unannounced inspections [11]
- Industry peer oversight from manufacturers, contractors, and distributors [12]
- Connector certification for cold-formed steel components [12]
Why these matter to you:
- Easier permit approval
- No insurance surprises
- Better resale value
- Peace of mind that your building meets all codes [10][12]
Bottom line: Certified components mean your project sails through permitting and stands up to inspections. No delays. No rework. Just approval and construction.
Defining Your Project Requirements
Plan your shed's purpose today and five years ahead, because the most expensive building is the one that doesn't meet your actual needs.
Determining purpose, size, and load requirements
Start with a simple truth: the most expensive building is the one that doesn't meet your needs. Your shed's purpose drives every decision–from dimensions to door placement. List what you'll do in the space today and five years from now. The number one regret? Not going bigger [13].
Map out your space requirements:
- Inventory all equipment, vehicles, and materials needing storage
- Sketch a floor plan (graph paper works–each square equals 5 feet) [13]
- Add 20% for working room and future growth
- Consider traffic flow and access patterns
Clear-span vs. multispan matters more than you think. Yes, buildings with interior columns cost less upfront. But they limit flexibility–you can't rearrange around permanent posts [13]. For maximum versatility, clear-span wins every time.
Height calculations keep it practical:
- Standard eave heights: 10-30 feet
- Specialty applications: up to 40 feet
- Rule of thumb: eave height = tallest equipment + 2 feet minimum clearance [13]
- Door headers need 2 feet below the eave [13]
Your location determines structural requirements. Snow loads in Minnesota demand heavier framing than storage sheds in Arizona. Wind ratings for coastal areas require different bracing than inland sites [14]. These aren't suggestions–they're code requirements that affect your steel gauge and reinforcement needs [14].
Smart orientation saves money long-term. Position doors away from prevailing winds. Face the long side south for passive solar gain if you'll heat the space [13]. Plan utility access before you build–it's cheaper to rough in electrical during construction than cut concrete later.
Budget planning and total cost of ownership
Your steel building budget breaks into predictable categories. Start with the basics: prefab kits run $15-25 per square foot, while professionally installed buildings cost $24-43 per square foot complete [15]. Bigger buildings cost less per square foot–economy of scale works in your favor [17]. Foundation costs catch many buyers off guard:
- Gravel pad: $1-2 per square foot
- Concrete slab: $10-12 per square foot
- Site prep: add $1 per square foot [16]
The hidden costs that actually matter:
- Permits: $500-3,000 (varies by location and complexity) [15]
- Professional installation: $3-6 per square foot [16]
- Electrical rough-in: $50-100 per hour [16]
- Location premium: Northeast runs 15-25% above average, Southwest 5-15% below [17]
Long-term ownership tells the real story. Steel buildings need about 1% of initial cost in annual maintenance. Wood structures? Try 2-4% [17]. Insurance companies reward steel's fire resistance with premiums 40% lower than wood construction [17]. As covered in detail in our lifecycle cost comparison section, these savings compound dramatically over 20 years.
Smart upgrades that pay back:
- Insulation: $2-6 per square foot prevents condensation and cuts energy costs [17]
- Quality door packages: $500-3,000 per opening for security and weather-tightness [17]
- Climate control rough-ins: $3-8 per square foot if you'll condition the space [17]
Bottom line: A 12×20 prefab kit costs $4,000-6,000. The same size custom-built? $14,400-36,000 [16]. The math favors steel every time.
Timeline expectations and lead‑time considerations
Realistic timelines prevent frustration. Here's what actually happens: half of all steel building orders deliver within 10-60 days. Another 30% arrive in 61-80 days. Only 1% take longer than 100 days [18]. Your specific timeline depends on controllable factors. What speeds things up:
- Standard designs move fastest through production
- Common colors stay in stock
- Complete plans submitted upfront
- Permits pulled before ordering
What slows things down:
- Peak construction season (everyone's building)
- Custom engineering requirements
- Design changes mid-process (resets the clock) [20]
- Special finishes needing pre-coating [18]
- Western state delivery (add a week per phase) [20]
The permit wild card deserves special attention. You can't install without permits, period [18]. Some jurisdictions approve in days, others take months. Start your permit process immediately–it's usually your longest lead time.
Weather matters more than you'd think. Extreme conditions delay transportation and installation, creating a domino effect on schedules [19]. Smart money schedules installation for mild weather windows.
Work backward from your target completion:
- Identify your must-have date
- Add installation time
- Add delivery and transportation
- Add fabrication (4-6 weeks typical)
- Add engineering and approvals
- Add permit timeline
- Start there
The companies that deliver on time? They're upfront about realistic schedules and keep you informed when variables change. At National Steel Buildings, we track every phase and communicate proactively–because surprises belong in birthday parties, not building projects.
Site constraints: soil, slope, climate, and zoning
Your site tells you what foundation you need–listen to it. Good soil (sand or gravel) supports 2,000-3,000 pounds per square foot. Clay? That's a different story. It swells when wet, shrinks when dry, and can crack slabs or shift piers [14]. Spend $500-1,500 on soil testing now or thousands on foundation repairs later [14].
Slope changes your foundation game:
- Flat sites: simple slab works great
- Moderate slopes: stem walls handle grade changes
- Steep terrain: pier foundations cost less than massive earth moving [14]
Climate drives code requirements:
- Frost depth: zero inches in Florida, 48+ inches in Minnesota [14]
- Seismic zones: extra anchoring required
- Hurricane regions: enhanced uplift resistance mandatory [14]
- High water table: deeper footings or drainage systems
Think ahead on utilities. Running power and water rough-ins before concrete costs pennies compared to cutting slabs later [21]. Mark existing utilities before you dig–hitting a gas line ruins everyone's day.
Zoning reality check:
- Setbacks from property lines
- Maximum height restrictions
- Lot coverage percentages
- Required inspections [22]
Call your zoning office first. Some jurisdictions want engineered foundation plans with permit applications. Others require multiple inspections during construction [14]. No permits = no building, regardless of how ready your site looks.
Access matters more than you think. Delivery trucks need solid, wide paths to your site. Soft ground or tight turns mean stuck trucks and delay charges [22]. Plan your delivery route before ordering–it's cheaper to improve access roads than pay crane fees for remote placement.
The foundation and site prep details in our installation section cover specific requirements for each foundation type. For now, know this: proper site evaluation upfront prevents expensive surprises during construction.
Key Selection Criteria for Steel Shed Kits
Size your steel shed between 3,000 and 10,000 square feet to minimize cost per square foot while leaving room for future growth.
Size and span options that match your needs
You'll find steel shed kits in sizes from 50 square feet to 6,000+ square feet. Popular dimensions–30×40, 30×50, 40×60, and 50×100–fit most business needs without breaking your budget [23].
Your intended use drives the right size choice. Need space for your mechanic shop or farm equipment? A 30×30 gives you 900 square feet of clear workspace. Running a commercial operation? A 40×80 delivers 3,200 square feet for warehousing or manufacturing [23].
Here's what saves you money: square buildings cost less per square foot because they minimize perimeter walls [23]. The sweet spot? Buildings between 3,000-10,000 square feet deliver the lowest cost per square foot [23].
For height, standard eave options run 10-30 feet in 2-foot increments. Pick based on your tallest equipment plus working clearance [23]. The number one regret we hear? "I should have gone bigger." Take inventory of everything you'll store–then add 20% for future growth [23].
Clear-span or multispan? Clear-span costs more but gives you unobstructed space for large equipment and flexible layouts. Multispan saves money with interior columns but limits your options [23]. Quick reference:
- 12×20: Perfect for yard equipment storage
- 10×20: 200 square feet for workshop or home office
- 20×31: 620 square feet fits small vehicles, boats, ATVs [24]
Steel gauge, coating, and corrosion resistance
Steel gauge numbers work backward–lower means thicker and stronger. You need to know three things:
Frame Gauge
- 14-gauge (0.075"): Standard for most applications
- 12-gauge (0.105"): 40% thicker for high-wind zones or heavy snow loads [25]
Panel Gauge
- 29-gauge: Light-duty only–skip this for serious use
- 26-gauge: Your workhorse option for garages and workshops
- 24-gauge: Premium choice when weather gets nasty [25]
Protective Coatings That Matter Basic galvanized gives you zinc protection–when scratched, the zinc takes the hit first [27]. Step up to Galvalume (55% aluminum, 43% zinc) for coastal areas or humid climates. You'll get a 25-year perforation warranty that means something [27].
Want color? Painted finishes over Galvalume give you 15-20 color options plus 30-40 year warranties against fading and chalking. That's protection you can see and count on [27].
For climate control, double-bubble insulation blocks 96% of radiant heat while stopping condensation. Need more? Fiberglass batting delivers R-7 to R-8 for serious workshop environments [27].
Simple maintenance keeps your investment protected–we cover the complete maintenance schedule in the Long-Term Value section.
Roof style, insulation, and energy‑saving features
Your roof choice affects everything from energy bills to equipment protection. Gable roofs shed water and snow efficiently. Single-slope designs work perfectly for solar panels. But the real game-changer? Proper insulation that turns your shed into a year-round workspace.
Stop Condensation Before It Starts Steel conducts heat–that's physics. When warm air hits cold metal, you get moisture. Then rust. Then damaged inventory [28]. The fix? Insulation with vapor retarders rated below 0.1 perms. Skip the old vinyl stuff at 1.0–it won't cut it [28].
Pick Your Insulation by Purpose
- Spray foam (R-6.0 to R-8.0 per inch): Top choice for seamless protection [30]
- Rigid board (R-4.0 to R-8.0 per inch): Great for open walls [30]
- Fiberglass blanket (R-2.9 to R-3.8 per inch): Budget-friendly, easy install [30]
- Reflective bubble (R-1.0 to R-1.3): Basic condensation control [30]
Energy-Saving Options That Pay Cool roofs with reflective
Compliance with local building codes, permits, and HOA rules
As discussed in Defining Your Project Requirements, building codes and permits form the foundation of any successful steel building project. Your local jurisdiction sets specific requirements for snow, wind, and seismic loads based on IBC standards with regional modifications [31].
Permit Reality Check Expect to invest $550-$2,000 for permits depending on your project size and location [31]. Skip this step and you risk:
- Fines and forced demolition
- Insurance denial
- Property sale complications
- Personal liability for injuries [31]
HOA Approval Strategy Living with an HOA? They'll review your shed's size, placement, and appearance [33]. Many restrict metal buildings for "aesthetic uniformity"–but you've got options. Today's steel buildings offer brick, stone, stucco, and wood siding that satisfy appearance requirements while keeping steel's advantages [32].
Your HOA success plan:
- Study your covenants inside out
- Get municipal permits first–show you mean business
- Bring photos of similar approved structures
- Document every conversation [32]
Pick a steel kit with customizable exteriors that match your home's style. You get the look they want with the durability you need [33]. Need help navigating local requirements?
Customization and Design Flexibility
Modified standard kits let you customize your shed with proven engineering while avoiding custom design costs and lengthy timelines.
Standard vs. fully custom kit configurations
You have three main paths to your steel shed: standard kits, fully custom designs, or the sweet spot–modified standard kits. Standard kits get you up and running fast (under four weeks) with lower upfront costs [36]. They're perfect when your needs match what's on the shelf.
Custom configurations let you tailor every detail–from exact dimensions to door placement–making them ideal for tricky sites or specialized equipment [36]. Yes, they cost more initially, but you get exactly what you need without future modification headaches.
Here's what most buyers choose: modified standard kits. You start with proven engineering and add features like canopies, extra doors, or specialized panels without blowing your budget or timeline [35]. You skip the engineering costs while getting the customization you need.
The real difference? Material quality. Budget kits often cut corners with thinner steel that needs repairs sooner [34]. Quality custom configurations use materials matched to your location and use–they cost more now but save money long-term [34].
Your decision comes down to this: Buy cheap and modify later, or invest once in what actually works for your equipment, your site, and your business [36].
Door, window, and access options for functionality
Your access options make or break daily operations. Here's what works:
Roll-up doors: Save floor space by coiling overhead. Perfect for forklifts and frequent access. Tough, secure, and available up to 20 feet wide [37].
Sliding doors: No swing space needed. Single or double configurations work for everything from equipment bays to personnel access [37].
Walk-in doors: Your everyday entry. Steel construction with windows, insulation, and security options to match your needs [37].
Overhead sectional doors: Best for climate-controlled shops. Superior insulation plus automatic openers keep your workspace comfortable [37].
For natural light without losing wall space:
- Fixed windows with tempered glass and energy-efficient coatings [37]
- Sliding windows for ventilation without swing clearance
- Skylights that flood workshops with overhead light–fixed or operable for airflow [37]
Match your doors to your work. Storing vehicles? Basic roll-ups work fine. Running a secure operation? Steel roller shutters with heavy-duty locks keep equipment safe [38][39]. The right configuration saves time every single day.
Exterior finishes, colors, and aesthetic accessories
Your steel shed doesn't have to look like a metal box. Since strength comes from the frame–not the panels–you can dress it up however you want [40].
Finish options that work:
- Brick, stucco, or stone facades for upscale properties
- Wood siding to match existing buildings
- Standard metal panels in 20+ colors
- Any combination that satisfies your HOA or design standards [41]
Color choices matter: Light colors reflect heat and cut cooling costs. Dark colors make a statement. Quality paint systems carry 30-40 year warranties against fading and chalking–protecting your investment and property value [40].
Functional upgrades:
- Windows for natural light
- Skylights for overhead illumination
- Mix of door types for efficient workflow [42]
You get steel's strength and durability wrapped in whatever look fits your property. No compromises [41].
Integrated utilities: electrical, plumbing, and ventilation
Want a workshop, office, or conditioned storage? You'll need utilities. Here's what works:
Electrical ($100-$5,000): Metal conducts electricity, so proper installation matters. All wiring goes in conduits with correct grounding. Hire licensed electricians–DIY electrical work in metal buildings isn't worth the risk [43][44].
Plumbing ($500-$1,500): Plan bathroom and sink locations before pouring your slab. Rural properties may need septic systems. Choose between traditional water heaters or space-saving tankless models [43][44].
Climate control: Metal transfers heat, so insulation and HVAC matter more. Options:
- Central HVAC with ductwork for whole-building comfort
- Ductless mini-splits for zone control without major modifications
- Radiant floor heating in slabs for consistent warmth [44]
Ventilation: Stop condensation before it damages equipment. Install ridge vents, exhaust fans, and position windows for cross-flow. Add dehumidifiers in humid climates [44].
Get permits first. Plan utilities during design–not after. Work with professionals who understand
Installation Planning and Site Preparation
Soil testing ($500-1,500) reveals what your ground can handle, guiding you toward concrete slabs, pier foundations, or stem walls that match your specific site conditions.
Foundation types: slab, pier, and insulated footings
Concrete Slabs: The Go-To Choice Most customers choose concrete slabs because they get foundation and floor in one pour. You'll need 4-6 inches thick for standard sheds, with edges thickened to 12-18 inches where your columns sit [14].
Slabs work great when you have stable soil. Just remember the prep work: compacted gravel base, vapor barrier, and anchor bolts positioned exactly where your shed kit specifies [14]. Cost runs $4-8 per square foot–straightforward and predictable.
Pier Foundations: Problem Solver Got clay that swells? High water table? Steep slope? Pier foundations put concrete supports right under each column, lifting your building above the problems [14].
You get bonus crawl space for utilities and airflow that keeps moisture away. The catch? You'll need a separate floor system, pushing costs up 30-50% over slabs. Budget $200-600 per pier plus flooring [14].
Stem Walls: The Middle Ground Think of stem walls as the best of both worlds. You get a perimeter wall on concrete footers, then fill the middle to create your slab [14]. They handle moderate frost conditions and keep water out better than standard slabs.
Making the Smart Choice Start with soil testing ($500-1,500)–it tells you what your ground can actually handle. Sandy soils typically support 2,000-3,000 pounds per square foot. Clay? That's a different story [14].
Your location matters too. Frost depth ranges from zero in the South to 48+ inches up North [45]. Get an engineer who knows steel buildings to verify your foundation meets local codes and your specific loads [46].
At National Steel Buildings, we've seen every foundation challenge imaginable. Our design team factors in your soil, climate, and budget from day one–keeping your project on track and
DIY assembly vs. professional installer pros and cons
The decision between self-assembly and professional installation significantly impacts your steel shed project's timeline, budget, and final quality. DIY kits offer 30-50% upfront savings compared to professionally installed options by eliminating labor costs [47]. This approach provides complete control over customization, pacing, and design decisions, creating personal satisfaction from building something tangible yourself [47]. However, self-assembly requires substantial time commitment–what professionals complete in 1-2 days often takes DIYers several weekends or even months [49]. The DIY route demands specific tools like power drills, ladders, scaffolding, and potentially small lifts or cranes for larger buildings–rentals or purchases that quickly erode initial savings [47].
Additionally, mistakes in alignment, sealing, or material handling can compromise structural integrity, potentially voiding warranties and requiring costly corrections [48].Professional installation offers significant advantages despite higher initial costs. Experienced installers bring specialized expertise that translates into square walls, secure roof trusses, and proper anchoring–all critical for long-term durability [49]. This expertise extends to navigating building codes, setback requirements, and permit processes that vary by location, preventing potential legal complications [49]. Many manufacturers require professional installation to maintain warranty coverage, providing essential protection for your investment [49]. The time efficiency cannot be overstated; professional crews often complete in hours what might take DIYers weeks [49].
For complex designs with utilities, insulation, or climate control features, professional installation significantly reduces risks of improper construction [49]. When evaluating options, consider your technical abilities honestly–if you've never framed a wall or installed a roof, professional installation likely offers better long-term value despite higher upfront costs [49]. The best approach often combines personal involvement in site preparation with professional assembly of the structure itself, balancing cost savings with quality assurance [49].
Essential tools, safety gear, and step‑by‑step checklist
Successful steel shed assembly requires specific tools and safety equipment to ensure efficiency and prevent injuries. Essential tools include power drills with screwdriver bits, ladders or scaffolding for roof access, measuring tape, levels for checking alignment, and wrenches for bolt tightening [50]. Safety gear should include work gloves, eye protection, hard hats during frame erection, and sturdy footwear with adequate traction [51]. Begin your installation by inventorying all kit components against the manifest–follow the instruction manual exactly, as skipping ahead often costs more time later [51].
Prepare your site by ensuring a level base, whether concrete slab, timber frame, or pavers, as improper foundations cause structural issues regardless of assembly quality [51]. Assemble the perimeter base frame first, ensuring it's perfectly square before proceeding to wall frames and corner posts [51]. When installing wall panels, start at one corner and work methodically around the structure, overlapping panels as instructed without overtightening fasteners, which can warp the metal [51]. Roof assembly typically follows with the installation of beams or trusses before attaching panels using weatherproof washers for leak prevention [51].
Complete the structure by hanging doors, installing any windows, and anchoring the entire shed to your foundation using appropriate hardware [51]. Before finalizing, conduct a thorough inspection checking all connections, alignment, and seals–proper site preparation and assembly technique significantly extend your shed's lifespan [50].
Site prep best practices for longevity and performance
Proper site preparation directly impacts your steel shed's longevity and structural integrity. Start by selecting a level, well-drained location and thoroughly clearing vegetation, debris, and rocks from the area [52]. For optimal drainage, grade the site with a minimum 2% slope (about ¼ inch per foot) away from the foundation to prevent water accumulation and potential damage [54]. Elevate your building pad 6-12 inches above the surrounding grade using properly compacted soil or engineered fill to further protect against moisture infiltration [54].
The foundation choice significantly affects long-term performance–gravel foundations provide excellent drainage and easy leveling for medium to large sheds, while concrete offers maximum stability for heavier structures [53]. For challenging sites with expansive clay soils, high water tables, or sloped terrain, consider pier foundations that elevate the building and create valuable airflow underneath [52][54]. Install appropriate drainage systems based on site conditions–swales redirect surface water, French drains manage subsurface moisture, and strategically placed downspouts prevent erosion around the foundation [54]. Common preparation mistakes include building too close to natural low points, skipping proper soil compaction (which leads to uneven settling), and relying solely on surface drainage without addressing subsurface water movement [54].
After installation, conduct bi-annual foundation inspections for signs of cracking, settling, or moisture problems, clear gutters regularly to prevent water accumulation, and keep the area around your shed free from vegetation that could trap moisture or cause foundation damage with invasive roots [52]. This comprehensive approach to site preparation creates a stable foundation that significantly extends your steel shed's usable lifespan.
Long‑Term Value, Maintenance, and Supplier Support
Quality manufacturers back their steel buildings with 20-50 year structural warranties and respond to claims within 24-48 hours, not weeks.
Warranty coverage, service agreements, and after‑sale support
Your steel shed warranty tells you everything about who you're buying from. Quality manufacturers back their buildings with 20-50 year structural warranties–the longer the coverage, the more confident they are [55]. You'll find warranties split into clear categories: rust-through protection for corrosion that penetrates steel completely, paint warranties covering fading and peeling, panel warranties for walls and roofs, and workmanship coverage when certified teams handle installation [57].
Here's what matters: manufacturers who handle warranties directly solve problems faster. Top companies respond within 24-48 hours, not weeks [55][56]. When you compare warranties, check what's not covered. Natural disasters fall under insurance. Same with damage from skipped maintenance, unauthorized changes, or vandalism [57].
The industry keeps improving warranty terms, especially for coastal and high-moisture areas where corrosion protection matters most [57]. Some manufacturers now offer 50-year coverage on materials and workmanship with specific protection for pre-painted panels [56]. Ask if warranties are prorated–full replacement value beats declining coverage every time [57].
The best warranties come with post-installation support and clear maintenance guidelines.
Maintenance schedule and corrosion prevention tips
Comparing lifecycle cost of steel shed kits vs. alternative materials Steel shed kits beat traditional materials on every cost metric that matters. You'll pay $20-35 per square foot for steel versus $22-39 for wood framing alone–before adding foundation, roofing, or finishes [61]. Build a 10,000 square foot structure and the numbers get clearer: steel runs $120,000-250,000 total, wood hits $350,000-500,000, and concrete reaches $500,000-700,000 [62].
The real savings show up in maintenance. Your steel building needs just 0.5-1% of its value in yearly upkeep ($1,500-2,500 for typical structures). Wood demands 2-4% annually ($7,000-20,000) [62]. Over 30 years, that $45,000 difference on a $75,000 building pays for serious upgrades [61].
Steel eliminates expensive surprises. No termite damage (a $5 billion national problem). No rot repairs. No fire reconstruction. Your insurance company knows this–expect premiums 15-30% lower than wood structures [61].
Energy costs favor steel too. Proper insulation saves you 10-20% on utilities ($2,000-5,000 yearly) versus traditional construction's $1,000-2,500 savings [62].
Add it all up over 20 years: steel buildings cost about $350,000 total, including everything. Traditional materials? $670,000 to $1.1 million [62]. That's $40,000-100,000 in your pocket while your building appreciates 20-30% [62].
When you're ready to expand, steel's modular design makes it simple. No major reconstruction needed. And when it's time to sell? Steel's 90% recyclable–concrete just creates expensive demolition waste [63].
Questions to ask manufacturers and red‑flag indicators
Smart buyers ask specific questions. Start with steel gauge specifications and ASTM compliance. Vague answers mean move on [64]. Get warranty details broken down by component–structural, panels, paint. Quality manufacturers offer 20-50 year structural coverage and spell out exactly what's protected [65].
Pin down the total price. Hidden costs in shipping, foundation prep, and customization can add 30-40% to your quote [65]. Ask for stamped engineering drawings specific to your location, not generic plans [64]. Request a real project timeline showing each phase: engineering, fabrication, delivery, installation. Most quality buildings deliver within 10-60 days [65].
Watch for these red flags:
- Pressure to decide today
- No customer references available
- Won't provide engineering specs
- Prices way below market (cheap materials ahead)
- Can't explain how their building handles your local wind, snow, or seismic loads [64][65]
Good manufacturers show you:
- Current certifications and insurance
- Detailed material specifications
- Clear maintenance requirements
- Post-purchase support plans [64]
Test their service before you buy. Ask about warranty response times, replacement part availability, and future modification help. Quality companies respond to issues within 24-48 hours [64]. If they're slow answering pre-sale questions, imagine the post-sale experience.
- Steel shed kits save 30-50% vs. professional install and outlast wood without rot or termites.
- Size up: add 20% to current needs; clear-span costs more but removes interior column limits.
- Match steel gauge to loads: 12-gauge frame for heavy snow, 26-gauge panel minimum for workshops.
- Concrete slab runs $4-8/ft²; pier foundations solve clay or slope but add 30-50% cost.
- Certified ASTM/MBMA components speed permits and cut insurance up to 40% versus wood.
- Expect 10-60-day kit delivery; permits and custom specs–not production–set the real timeline.
- Lifecycle beats wood: ~1% annual upkeep, 15-30% lower insurance, 90% recyclable at end-of-life.
- https://prometalbuildings.com/steel-building-kits-vs-fully-installed-metal-buildings/?srsltid=AfmBOopplnI0uUNCkPf7MVTMuSPCua8pkFe3keQ88mUukDeb1RU9LqNn
- https://www.carportcentral.com/blog/top-5-reasons-to-choose-steel-storage-sheds?srsltid=AfmBOopKG8fJ34_3zZ2tp0yz6OVQnjyEw7A_2Rc3VaR-286-G8ax4kUR
- https://www.shelterlogic.com/knowledge/wood-vs-metal-sheds-a-detailed-comparison-to-help-you-choose-the-right-one?srsltid=AfmBOop9N21WnFwy0Qxn2iIkRks7EGS6oLzxUwzEd2C9DWiM03D23hL2
- https://www.probuiltsteel.com/blog/steel-gauge-guide-metal-buildings/?srsltid=AfmBOopkpDeH77droZrFp3j_IrXH__uZg5bVqPWebKpfHmEZBaKkXt_4
- https://www.alliedbuildings.com/grades-and-standards-of-steel-for-pembs/
- https://jagmetalsllc.com/blog/understanding-the-certifications-and-standards-in-metal-building-materials/
- https://www.themanufacturer.com/press-releases/the-benefits-of-using-steel-building-kits-for-your-next-project/
- https://www.frameupnow.com/blogs/the-advantages-of-steel-frame-kits-in-modern-construction?srsltid=AfmBOord2YMnD06Mh3vQTVJH1q20aP_2cfebaOgae_O6ScUPPtPTtYZH
- https://futurebuildings.com/blog/steel-built-homes.html
- https://www.buildingsguide.com/build/metal-building-codes-permits/?srsltid=AfmBOoon0H0wd8DA_QPdKi8svexni_oQ8kmoDRsQbnehS3xnE9QmIduH
- https://sfia.memberclicks.net/stud-code-compliance-certification-program
- https://www.steelframing.org/certification-programs
- https://www.buildingsguide.com/build/metal-building-planning/?srsltid=AfmBOop4_FG-P9bZuWLFcgFy7S6wf2WBHWxiaKcTElC080iW0qXO_33W
- https://mbmisteelbuildings.com/blog/steel-building-foundation/
- https://www.duramaxshedsdirect.com/blogs/the-barn-blog/how-much-does-a-steel-building-cost?srsltid=AfmBOoo8HCJQOKvcBqLTLKW2BaJ9pcX4m5FuFchjLO1iEDql4PyB0rqf
- https://alansfactoryoutlet.com/blog/shed-cost/?srsltid=AfmBOoooNP81dPJQY8HAGqBHnY-mwI9wO6eYgfuQ_jf9qU5p1Febc_vc
- https://metalprobuildings.com/10×16-shed-buyers-decision-guide/
- https://www.vikingsteelstructures.com/metal-buildings-delivery-time-estimates?srsltid=AfmBOor6wbr1ztDCbAnkUMbKB16LFsIqfFt3JaaV8UzvHs2sf_K2b5Gi
- https://www.vikingmetalgarages.com/blog/factors-affecting-the-lead-times-and-delivery-of-metal-garages
- https://www.metallic.com/news-item/what-to-expect-order-process-and-lead-times-explained/
- https://buildway.com/metal-building-site-preparation-guide/
- https://lionbuildings.com/how-do-i-prepare-my-site-for-a-steel-building-install/
- https://www.buildingsguide.com/standard-sizes/?srsltid=AfmBOoq2ZIx8twYJNfQ4nqtiJJ4LUOCNNVYr2ODSRazGLtfVxJRIfcNJ
- https://www.getcarports.com/the-metal-shed-buyers-guide-sizes-options-and-prices?srsltid=AfmBOorHa2UDzI5iRKtkJSATESFsXMiGg3MKiJjUpay9_b_4YTC__7ja
- https://www.probuiltsteel.com/blog/steel-gauge-guide-metal-buildings/?srsltid=AfmBOoo_swWPx-Z115I70DkW0tu6dSBBWYev78qLvJ3W1gW3kqCpqBhx
- https://www.hqsteelstructures.com/the-complete-metal-building-buyers-guide/
- https://metalbuildingsnorthamerica.com/complete-guide-to-metal-buildings/
- https://www.buildingsguide.com/build/metal-building-insulation/?srsltid=AfmBOoruZGz1AV8loc0i2lvs9F3W7mxQzMI8m8cFhrRANx1N0M4cfrZc
- https://www.metalbuildingoutfitters.com/3-best-energy-efficient-metal-building-designs/
- https://www.westernstatesmetalroofing.com/blog/metal-roofing-building-insulation
- https://www.buildingsguide.com/build/metal-building-codes-permits/?srsltid=AfmBOoqQt7iBkf0eYovBVfA8nrPeUfJXz-bXJpe-AcPV15H4nr9ojyjL
- https://www.metalbuildingoutlet.com/hoa-regulations-for-metal-buildings/
- https://www.penndutchstructures.com/blog/hoa-shed-rules/?srsltid=AfmBOopfmOk4it5hibIe-wIBGgvoCiYIp5ng-yD1hJ9QVRYjuV9py9UI
- https://techsteel.com.au/articles/custom-steel-sheds-vs-standard-sheds-comparing-cost-quality-and-flexibility/
- https://www.rhinobldg.com/blog/standard-or-custom-steel-buildings
- https://www.abcsheds.net.au/blog/custom-sheds-vs-kit-sheds
- https://lionbuildings.com/top-7-door-and-window-options-for-steel-buildings/5/
- https://www.worldwidesteelbuildings.com/steel-buildings/garage-shop-workshop/
- https://kitbuildings.com/en-us/products/steel-dome-storage-buildings
- https://mavericksteelbuildings.com/resources/color-options/
- https://www.worldwidesteelbuildings.com/construction/components/custom-exterior-finishes/
- https://torosteelbuildings.com/blog/metal-storage-sheds/
- https://shedsunlimited.net/blog/sheds-with-electricity/?srsltid=AfmBOooaAOQuYKczqBP4qnXW6DtdLJGf5lF0qVuicF3ZKCt6McGiVPkM
- https://lionbuildings.com/how-to-convert-a-metal-building-into-a-functional-living-space/5/
- https://www.rhinobldg.com/blog/steel-building-foundations
- https://www.summitsteelbuildings.com/understanding-concrete-foundations
- https://prometalbuildings.com/steel-building-kits-vs-fully-installed-metal-buildings/?srsltid=AfmBOoq8kPx-9pONErWTJtzhjCVa8FbPuE9uRtMPzW9Rvh52Z2AdjWb4
- https://metalprobuildings.com/diy-vs-prefab-storage-sheds/
- https://www.6ixassembly.ca/blog/shed-assembly-101-diy-vs-professional
- https://lionbuildings.com/how-do-i-prepare-my-site-for-a-steel-building-install/5/
- https://www.shelterlogic.com/knowledge/how-to-assemble-a-metal-shed?srsltid=AfmBOoohnIb231hr2Shhmd8E3qhW3iwjqy79EIHQIVAHVciip6woX9q4
- https://qsbuildings.com/blog/lay-the-groundwork-essential-steps-for-building-shed-foundations
- https://okstructures.com/blog/shed-site-prep-guide/?srsltid=AfmBOorhR3z_6hFhAqk-289nPqhhl4iDYpE0i7-P19z7ITXRfBME03cM
- https://metalprobuildings.com/drainage-grading-tips-for-steel-building-sites/
- https://www.wrightsheds.com/shed-manufacturers/
- https://www.worldwidesteelbuildings.com/blog/our-50-year-steel-building-warranty/
- https://garagebuildings.com/steel-building-warranties-explained-whats-really-covered-in-2025-2026
- https://marbuildingsolutions.com/metal-building-maintenance-care-guide/
- https://mbmisteelbuildings.com/blog/maintenance-and-care-tips-for-metal-buildings/
- https://www.worldwidesteelbuildings.com/blog/how-to-prevent-rust-on-metal-buildings/
- https://metalbuildingsnorthamerica.com/steel-commercial-buildings-beat-wood-every-time/
- https://www.summitsteelbuildings.com/20-year-cost-comparison
- https://xtdsteel.com/steel-structure-building/steel-building-lifecycle-cost/
- https://titansteelstructures.com/metal-structure-tutorials/mistakes-to-avoid-when-purchasing-a-metal-building-a-complete-buyers-guide/
- https://thelunacrew.com/20-questions-to-ask-before-buying-a-steel-building/