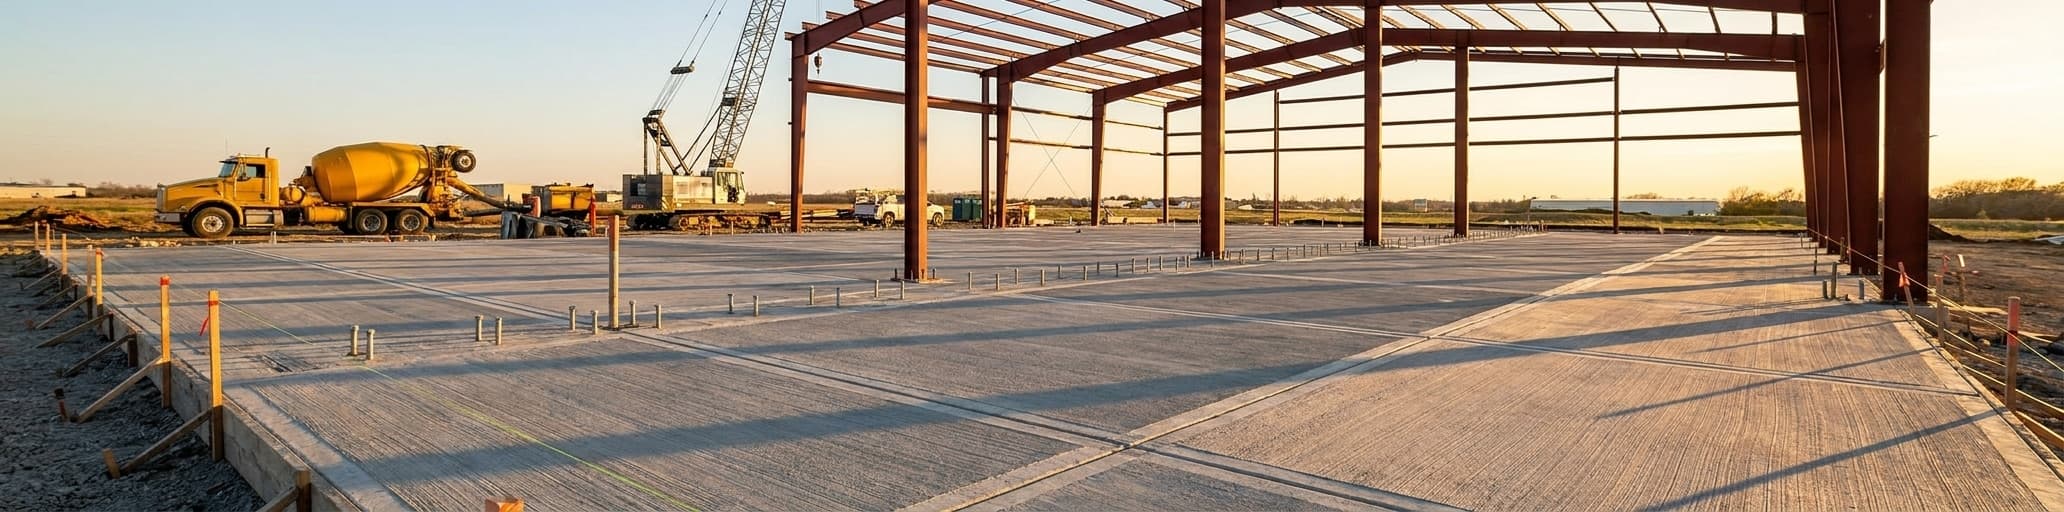

We help you choose the proper concrete thickness for your 30×40 steel building by evaluating expected loads and site conditions against code standards before the pour. Getting the slab right the first time protects your warranty, avoids costly retrofits, and ensures a durable floor that supports any future equipment.
Determine the Optimal Concrete Thickness for Your 30×40 Steel Building
Specify your exact load types before pouring concrete, because retrofitting slab thickness after the concrete sets is not an option.
Assess load requirements for agricultural, commercial, or aviation applications
Your intended use is the single biggest driver of slab thickness for a 30×40 steel building — and getting it wrong costs far more to fix than to spec correctly upfront. A standard agricultural storage building holding hay, seed, or hand equipment sits comfortably on a 4-inch slab poured to at least 2,500 psi. [2] Once you introduce working farm loads — tractors, combines, or loaded grain wagons making regular passes across the floor — those rolling point loads compress a thin slab over time, and 6 inches becomes the practical floor. [1] Commercial applications follow the same logic: a retail shop or light-use workshop handles 4 inches without issue, but a vehicle service bay or floor with regular forklift traffic needs 6 to 8 inches to resist cracking under concentrated loads. [1] Aviation is its own category.
Even a single-engine aircraft parks its landing gear load into a surprisingly small contact patch, and if a tow vehicle or fuel truck ever crosses your 30×40 hangar slab, those dynamic loads push the minimum to 6 inches with engineered rebar reinforcement — not wire mesh. The bottom line: identify every load type that will ever touch your floor before you pour, because retrofitting thickness is not an option after the concrete sets.
Evaluate soil bearing capacity and local code standards for slab design
What's underneath your slab matters as much as the concrete itself. Well-compacted granular soils distribute loads evenly and give your slab a stable platform, but weak, moisture-sensitive, or expansive soils create differential settlement that causes cracking no matter how thick the pour. [5] Before a single yard of concrete is ordered, a soil bearing test — typically $500 to $800 — tells you exactly what your ground can handle. [4] Skipping it has real consequences: one contractor assumed a 2,000 pounds-per-square-foot bearing capacity on a large metal building project, only to discover the soil topped out at 1,200. The building sank on one end, and the fix — helical piers driven 15 feet deep and a full foundation restart — cost $47,000. [4] Where soil conditions are poor or inconsistent, engineers don't just increase overall thickness; they specify deeper granular subbases, localized thickening under column pads, or drainage corrections to stabilize the support layer before addressing the slab itself. [5]
Code requirements add a second layer of precision to this process. International Building Code Chapter 18 mandates formal soil and foundation investigations whenever site conditions are questionable, expansive soils are identified, the groundwater table is elevated, or the project falls within certain seismic design categories. [5] Those findings feed directly into the engineer's slab specification — reinforcement layout, joint placement, edge thickening at doors and perimeter walls, and frost protection depth for northern climates where freeze-thaw cycles can heave an undersized slab. [5] Every slab design for a steel building should be reviewed and stamped by a licensed structural engineer, not to satisfy bureaucracy, but because the steel frame concentrates loads at specific column points rather than spreading them evenly, and only an engineered drawing accounts for that load path correctly. [5] Most jurisdictions also require two inspections — one before the pour to verify rebar placement and subgrade prep, and one after curing — so factor two to four weeks for permit approval into your 30×40 metal building budget before breaking ground. [4]
National Steel Buildings' recommended thickness guidelines: 4" vs 6"
NSB's baseline recommendation for a 30×40 steel building is a 4-inch slab poured to at least 2,500 psi — the accepted industry starting point for residential garages, general storage, light workshops, and any application where floor loads stay predictable and light. [6] The decision to move to 6 inches isn't driven by square footage; it's driven by load distribution.
A forklift pressing through four small tire contact patches creates far more stress per square inch than a flatbed trailer spreading the same total weight across a much larger area — and a 4-inch slab can't absorb that concentrated pressure indefinitely without cracking. [7] When the application pushes into 6-inch territory, NSB pairs that depth with 4,000 psi concrete rather than the 2,500 psi baseline, because increased thickness and higher compressive strength work together: depth resists bending under load, while higher PSI resists surface failure under impact and repeated stress cycles. [8] The practical rule is straightforward: if there's any reasonable chance your 30×40 build will ever see commercial vehicles, mechanical lifts, or heavy rolling equipment at any point in its working life, specify the 6-inch slab before the pour — because upgrading concrete thickness after it sets isn't a repair option, it's a full replacement. [6]
Calculate Materials and the cost of a 30×40 concrete slab 4 inches thick
A 30×40 slab requires 16 cubic yards of concrete at $1,875-$2,250, with rebar reinforcement costing $1.50-$2.50 per square foot for vehicle traffic.
How many yards of concrete are needed for a 30×40 slab 4 inches thick?The math for a 4-inch slab is straightforward: multiply length x width x thickness to get cubic feet, then divide by 27 to convert to cubic yards. [9] For a 30×40 footprint, that's 30 x 40 x 0.333 (4 inches expressed as a decimal foot) = 400 cubic feet / 27 = 14.81 cubic yards.
In practice, order 16 yards.
Stopping a pour mid-slab to wait for a second truck costs far more in labor and cold joints than the marginal price of one extra yard, and most ready-mix plants will credit you for full returned drums — so erring high is the only sensible call. [10] That 14.8-yard baseline also gives you a built-in upgrade reference: every additional inch of thickness across the full 1,200-square-foot 30×40 footprint adds roughly 3.7 cubic yards, putting a 6-inch pour at approximately 22.2 cubic yards total — a number worth having before your engineer finalizes the spec.
Material cost breakdown: concrete, rebar, vapor barrier, and finish options
The concrete material itself accounts for a smaller share of the cost of a 30×40 concrete slab 4 inches thick than most owners expect. Ready-mix runs $125-$150 per cubic yard, putting raw material for your 14.8-yard pour at roughly $1,875-$2,250 before any reinforcement, prep, or finishing. [11] Reinforcement is where your specs — and your budget — split: wire mesh adds $0.75-$1.00 per square foot across the 1,200-square-foot footprint, while a rebar grid runs $1.50-$2.50 per square foot. [11] For any slab that will see rolling equipment, vehicle traffic, or point loads from column anchors, rebar is the correct choice — a 30×40 layout with bars spaced 18 inches on center requires approximately 1,771 linear feet once you factor in 10% for overlaps and waste. [12] Vapor barriers add $0.50-$1.00 per square foot ($600-$1,200 total) and are non-negotiable for any enclosed building: without one, ground moisture migrates through porous concrete and attacks flooring adhesives, stored equipment, and the slab surface itself over time. [11] For a full picture of how these line items roll into your 30×40 steel building cost, finish selection is the last variable to lock in.
A standard broom finish is included in most contractor quotes, carries the lowest cost, and delivers the non-slip surface most commercial and agricultural floors actually need. Concrete sealers add $1-$3 per square foot and meaningfully extend surface life by reducing wear and moisture absorption. [13] Stamped or decorative finishes run $12-$18+ per square foot and make sense for retail storefronts or client-facing office space — they add zero functional value to a farm floor or vehicle bay. [13]
Labor, equipment, and NSB's turnkey pricing model for a 4‑inch slab
Labor runs $2-$3 per square foot on a concrete pour, putting crew cost alone at $2,400-$3,600 across the 30×40 footprint. [14] Stack in equipment — a ready-mix chute setup, screed rails, power trowel, and vibrator aren't optional on a 1,200-square-foot slab — and the total installed cost of a 30×40 concrete slab 4 inches thick lands between $9,600 and $12,000 under most market conditions. [12] That range assumes professional installation, which matters: pouring concrete demands specialized skills and access to heavy-duty equipment, and even minor errors during mixing, pouring, or curing can produce surface defects, drainage problems, or structural weakness that cost more to fix than the original labor savings. [14] NSB's turnkey pricing model folds the slab scope directly into the building contract — engineering, concrete prep, and steel erection under one agreement — so you're never coordinating a concrete sub against a separate steel crew or finding mid-project that the anchor bolt layout doesn't match the column plan.
One contract, one schedule, one point of contact from site prep to final panel, and the 30×40 turnkey model keeps your total cost within budget without the hidden fees that show up when you're managing multiple trades yourself.
Compare 4‑Inch and 6‑Inch Slab Options with NSB's Unique Cost‑Benefit Table
A 6-inch slab costs more upfront but prevents the far costlier full replacement that concentrated loads trigger on under-spec foundations.
Up‑front cost differences and long‑term durability analysis
The upfront cost gap between a 4-inch and 6-inch slab on a 30×40 footprint is real but narrower than most owners expect — and the long-term math almost always favors the thicker pour.
A 6-inch slab requires more materials and slightly more labor than its 4-inch counterpart, but that premium buys meaningfully better resistance to the failure modes that generate real repair bills: cracking under concentrated loads, surface deterioration from repeated stress cycles, and settlement where ground conditions shift over time. [6] A slab that cracks through under a forklift or heavy rolling equipment isn't a maintenance item — it's a full replacement, and that cost dwarfs the original upgrade delta many times over. [15] When the foundation is properly prepared, correctly reinforced, and poured to the right depth for its intended load, concrete doesn't just hold its strength — it improves with age, and a well-executed slab can perform for decades without structural intervention. [16] The decision framework is straightforward: if your 30×40 build stays in light-use territory for its entire life — passenger vehicles, hand tools, general storage — a 4-inch slab delivers full value within budget.
The moment there's any realistic chance of commercial vehicles, mechanical lifts, or heavy equipment entering the picture now or later, the 6-inch slab is the cost-effective choice, because you're not paying for extra concrete — you're paying to avoid a slab replacement.
Impact on building warranty, structural performance, and future upgrades
The slab your 30×40 steel building sits on isn't just a floor — it's a load-bearing structural system, and that distinction matters the moment you file a warranty claim. Steel columns transfer forces at specific, concentrated points rather than spreading weight evenly across the floor, so a slab that can't handle those point loads will crack exactly where it matters most. [17] Under-spec slabs are more prone to cracking, rutting, and joint spalling — failure modes that fall outside normal wear-and-tear coverage under most manufacturer warranties and cost far more to address after the frame is erected than they would have during the pour. [17] Getting the thickness right upfront isn't cautious spending; it's what keeps your warranty intact and your structural performance on track for the long run.
The future-upgrade angle is where the slab decision carries the most risk, because it's the one building component you cannot adjust incrementally after the fact. If you later add an automotive lift, bring in forklifts, convert the space from storage to light manufacturing, or expand operations in any direction that adds load, the floor has to support those demands from the first day of that transition. [6] A 6-inch slab poured at the outset handles that range of scenarios without structural compromise; a 4-inch slab that was never intended for those loads cannot be thickened in place — it has to be replaced entirely, at a cost that dwarfs the original upgrade delta. [6] When properly poured with sound subgrade preparation and correct drainage, concrete doesn't just hold its strength over time — it improves with age, meaning a well-executed slab becomes a more reliable structural asset every year it performs without intervention. [17]
Decision flowchart: when to choose a 4" slab versus a 6" slab for your project
The decision reduces to three questions, answered in order before a yard of concrete is ordered. First: what loads will ever touch this floor — now and at any point in the building's working life?
If the honest answer stays within passenger vehicles, hand tools, light storage, and general agricultural hand equipment, a 4-inch slab at 2,500 psi covers the full scope. [6] Second: does your use case include forklifts, commercial vehicles, mechanical lifts, RVs, or any heavy rolling equipment? A single "yes" moves the spec to 6 inches at 4,000 psi — not because of square footage, but because those loads concentrate pressure into small contact patches that a 4-inch slab cannot absorb indefinitely without cracking. [8] Load distribution is what actually drives the decision: a forklift pressing through four small tire contact patches generates far more stress per square inch than the same total weight spread across a trailer's full footprint, and thickness is what absorbs the difference. [8] Third: are your soil conditions stable, your local codes standard, and your climate free from deep frost lines or expansive clay?
Weak soils, high water tables, seismic categories, or cold-climate perimeter footings that must extend below the frost line all require engineering review before thickness is finalized — and those site variables can shift a borderline 4-inch spec to 6 inches independent of floor loads. [3] If all three questions land in the light-use, stable-soil, standard-code column, build the 4-inch slab. The moment any single answer points toward heavy loads, evolving use, or uncertain ground conditions, spec the 6-inch slab before the pour — that's the only moment the upgrade is cost-effective rather than a full replacement. [6]
Streamline Your Project Using National Steel Buildings' Integrated Quote and Installation Process
Eliminate hidden coordination costs by working with one contract, one schedule, and one point of contact from site prep through final installation.
How NSB's single‑source turnkey service eliminates hidden fees and coordination hassles
The hidden fees in a multi-contractor build don't show up in any individual quote — they appear in the gaps between scopes. When a concrete sub and a steel erector are working under separate contracts, no one owns the coordination between them, and misalignments that would have cost nothing to fix during planning become expensive change orders after the slab has cured.
A turnkey contract closes that gap by design: the construction company takes on sole responsibility for design, build, and project management, so cost, schedule, and liabilities stay with one entity instead of shifting between trades at your expense. [19] In a traditional general contractor arrangement, you supply the drawings and specifications and the builder constructs exactly what those documents describe — anything that falls outside the written scope becomes an extra, and those extras compound when an anchor bolt layout doesn't match the column plan, when subgrade prep gets called by one crew and inspected by another, or when permit timing aligns with one trade's schedule but not the other's. [18] NSB's single-source model means the anchor bolt pattern is confirmed against the steel frame's column plan before a yard of concrete is ordered, not discovered as a problem after the slab sets. You deal with one contract, one schedule, and one point of contact from site prep to final panel — and the 30×40 turnkey approach keeps your total cost within budget because there's no gap between trades for surprises to hide in. [18]
Step‑by‑step guide to get an accurate concrete & steel building quote online
Pre‑construction checklist for site preparation and coordination with ProTrades erection team Site prep runs on a fixed sequence, and compressing any step in it creates problems that show up only after the erection crew arrives.
Start by clearing all debris and obstacles from the footprint and access routes — delivery trucks and rough-terrain forklifts need unobstructed paths to maneuver, and a site that can't accommodate them on day one costs time that compounds across every subsequent installation day. [22] Grade and compact the subgrade before the pour, install drainage corrections, then verify anchor bolt placement against the engineered column plan before a yard of concrete is ordered. [22] Once the slab is poured, concrete needs 14 to 28 days to reach design strength before steel erection begins — confirm that timeline with test breaks, not the calendar, because a slab that looks cured at day 10 may not yet carry column point loads. [22] The anchor bolt layout is the single most critical handoff between concrete and steel: if any bolt sits more than half an inch off the engineered position, erection stops immediately and the Engineer of Record determines the remedy — precision shims, slotting, or re-drilling are all options, but none proceed without engineer sign-off, because forcing a misaligned column damages the slab and compromises structural integrity from the first day of load. [22] Coordinating these phases means aligning three schedules simultaneously: concrete cure completion, permit inspection sign-off, and building delivery — so panels arrive the week the slab clears for load, not two weeks before it does.
For a clear picture of how cure time, delivery windows, and erection days stack into a realistic project calendar, the 30×40 steel building timeline guide breaks down each phase so you can plan around it before breaking ground. [22]
- Use a 4-in slab (2,500 psi) for light storage; upgrade to 6-in (4,000 psi) when forklifts, tractors, or aircraft will operate.
- Perform a soil bearing test ($500-$800) before ordering concrete; poor soil may require deeper subbase or piers.
- For heavy point loads, specify rebar reinforcement (18-in spacing) instead of wire mesh; rebar adds $1.5-$2.5/sq ft.
- A 30×40 slab 4-in thick needs ~15 yd3 concrete; 6-in thick needs ~22 yd3 – order extra to avoid cold joints.
- Factor 2-4 weeks for permit inspections (pre-pour and post-cure) and schedule concrete cure (14-28 days) before steel erection.
- If any heavy equipment, future upgrades, or uncertain soil exist, spec the 6-in slab now; retrofitting later requires full replacement.
- Include a vapor barrier ($0.5-$1/sq ft) and a broom finish; these are essential for moisture control and slip resistance.
- https://mbmisteelbuildings.com/blog/steel-building-foundation/
- https://lionbuildings.com/how-thick-does-a-concrete-slab-need-for-a-metal-building/2/
- https://www.uspatriotsteel.com/blog/concrete-slab-thickness-guide-for-steel-buildings/
- https://www.factorysteeloverstock.com/steel-building-foundation-requirements/
- https://up.codes/viewer/new_york/ny-building-code-2010/chapter/18/soils-and-foundations
- https://essexmetalbuildings.com/4-vs-6-inch-concrete-slab-everything-you-need-to-know-to-make-an-informed-decision/
- https://www.getcarports.com/how-to-prep-a-concrete-slab-for-a-metal-building?srsltid=AfmBOopP7w9gNFb5tJls8a0xGKc7HgxprewGosGjlTXIcKZ8Xc0abuGQ
- https://globalsteelconstruction.com/concrete-slab-thickness-for-metal-building/
- https://www.concretenetwork.com/concrete/howmuch/calculator.htm
- https://www.calculator.net/concrete-calculator.html
- https://nationalsteelbuildingscorp.com/blog/30×40-metal-building-with-slab-cost-the-complete-pricing-guide
- https://www.howmuchconcrete.io/measurement/30×40-concrete-slab
- https://localservicecalculator.com/concrete-slab-installation
- https://www.homeadvisor.com/cost/outdoor-living/concrete-slab/
- https://burtons-construction.com/how-to-know-if-you-need-a-4-5-or-6-concrete-pour/
- https://prestigesteelstructures.com/how-thick-of-a-slab-do-i-need-for-a-metal-building/?srsltid=AfmBOorMYOYMOfJuVOYlxiI4zH_KPyG3mdm0WPDNQZH9gXKOZ_Tg1dRk
- https://prestigesteelstructures.com/how-thick-of-a-slab-do-i-need-for-a-metal-building/?srsltid=AfmBOoqVN2kG9PQlgKYuXqK4ozBGWBoUDsby8uR6soV2OXBK_UyCl239
- https://www.marcusconstruction.com/blog/difference-between-general-contractor-design-build-and-turn-key-construction/
- https://jarvale.co.uk/blog/design-and-build-vs-turnkey-contracts-whats-the-difference/
- https://www.buildingsguide.com/metal-building-prices/?srsltid=AfmBOorILbL0_u4vm51YJqedmthfcD9T2EVJSSJrKykIAtSV42EOq-K9
- https://metal-america.com/accurate-concrete-prices-for-metal-buildings/
- https://www.worldwidesteelbuildings.com/blog/pre-construction-checklist-for-metal-buildings/