
We walk you through door placement, zoning strategy, and structural decisions that transform a 30×40 into efficient drive-through storage without sacrificing usable floor space. Proper planning upfront–from overhead door sizing to insulation specs–protects your investment and keeps throughput advantages intact for years.
Designing a Drive‑Through Layout
Door placement determines your entire drive-through layout, so position overhead doors to match your largest vehicle's approach path before planning anything else.
Planning the Traffic Flow for a 30×40 garage plans project
Traffic flow in 30×40 garage plans comes down to a single structural decision made before anything else: do vehicles back out, or drive straight through?
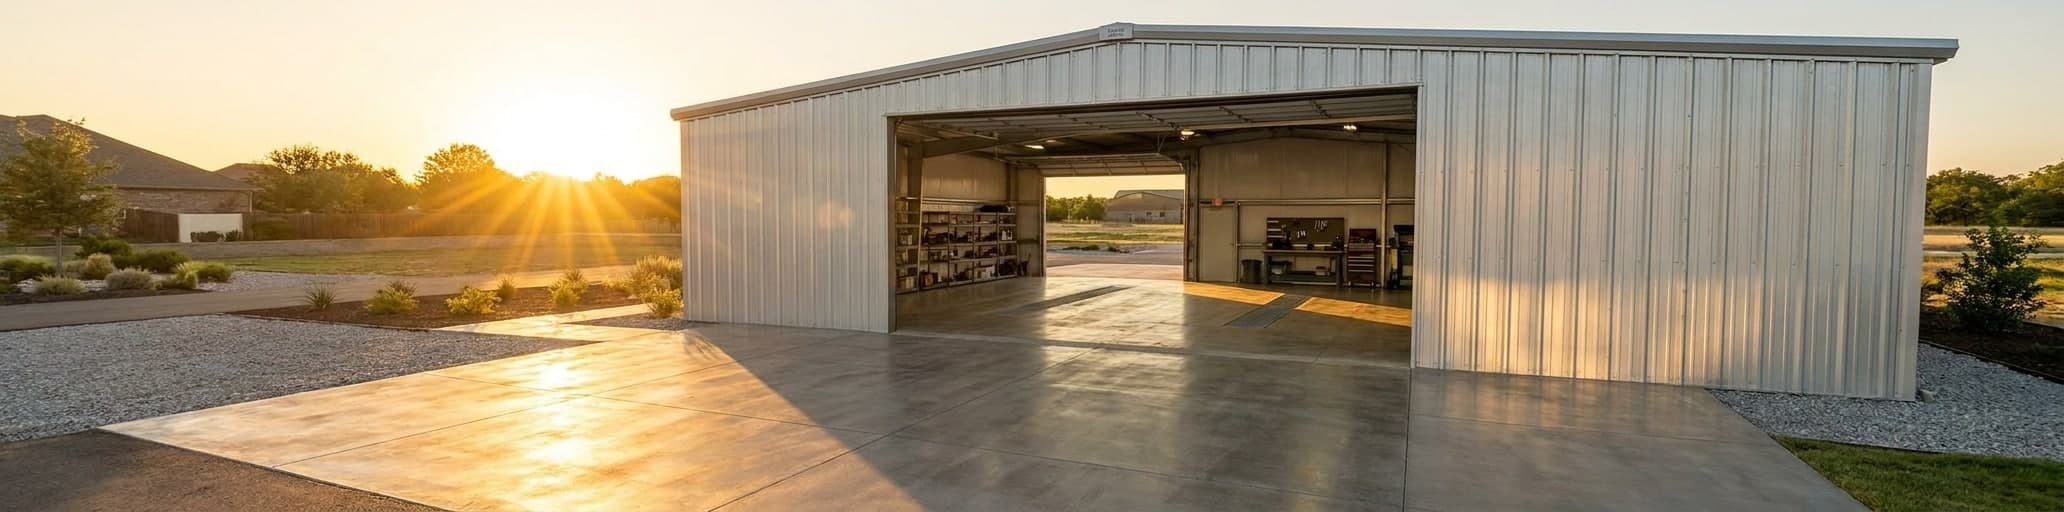
The drive-through configuration places overhead doors on opposite ends of the building, eliminating backing maneuvers entirely — a practical necessity when you're handling frequent vehicle turnover or moving heavy equipment on a schedule.[1] With 1,200 square feet of clear-span space, the 30×40 footprint typically supports up to three bays for standard passenger vehicles or work trucks, but that capacity only holds if door placement accounts for your largest vehicle's full approach path before it crosses the threshold.[1] Lateral door offset matters just as much as front-to-back alignment: a door centered on the wrong wall axis forces tight turns that negate the throughput advantage you built the layout to achieve.[2] Nail the door placement first — everything else, from bay striping to storage zones, arranges itself around that fixed flow path.
Selecting Door Types and Placement for Easy Access
Door type and opening size lock in everything that follows.
A drive-through 30×40 configured for RVs, motorhomes, and trailers typically specifies four 10'x12' overhead doors — two at each end — alongside a single personnel door for foot traffic.[4] Beyond standard sectional overhead doors, rollup, sliding, and bifold styles are all viable for this footprint, each trading off headroom requirements and operation speed.[4] Rollup doors coil above the opening rather than tracking back into the ceiling, which protects overhead storage space and keeps room clear for mechanical lifts inside the bay.
Door width matters more than door height for everyday parking, but height becomes the harder variable to correct once tall equipment defines your use case — nail down your largest vehicle's roofline requirement before committing to a rough opening.[4] When two narrower doors share the same end wall instead of one wide opening, spacing between them becomes critical: pack them too close and every pass turns into a mirror-threading exercise that defeats the throughput advantage you built the drive-through layout to deliver.[4] Personnel doors belong where people actually walk, not where leftover wall space happens to sit — storage infrastructure grows toward convenience, and a pedestrian door placed wrong gets blocked inside of a year.[4]
Optimizing Interior Zones for Storage and Workspaces
The floor is the most valuable square footage in a drive-through layout — and wall organization is what protects it. The most common mistake in farm equipment and vehicle storage planning isn't door placement; it's adding shelves, benches, and compressors after move-in, then acting surprised when the building feels cramped.[5] It didn't shrink — the floor got claimed.[5] Plan three distinct zones before the first vehicle rolls in:
- A perimeter wall zone for shelving, bins, and equipment that doesn't need floor space
- A fixed workbench run along one short wall — 10 to 12 feet is enough for most light shop work
- Clear center lanes wide enough for your largest vehicle with room to step out on both sides without squeezing
The 1,200 square feet in a 30×40 footprint works when storage stays vertical and active projects stay on the bench.[5] Once either category spreads to the floor, the drive-through lanes tighten and the throughput advantage you designed in disappears.[5] Build for the shop you'll have in six months, not just the storage you need today — most owners who start with pure parking add a bench, a tool chest, and an ongoing floor project within the first season.[5] A layout that absorbs that progression without surrendering the center lanes is what separates a building you work in from one you work around.[5]
Structural Planning and Code Compliance
Building codes and permits must be addressed before pouring your slab, since skipping approval prevents insurance coverage and complicates future property sales.
Choosing the Right 30×40 garage plans for Local Building Codes
Building codes matter most before you finalize your 30×40 garage plans — not after the slab is poured.
Every structure must be engineered to meet local jurisdiction requirements for live, snow, wind, and seismic loads; without those specs baked into the design from the start, a moderate storm can destabilize the building.[6] The International Building Code forms the national baseline in most U.S. jurisdictions, but local amendments layer on top — Florida mandates hurricane wind ratings, California requires seismic load compliance, and your county may add setback distances or footprint restrictions that constrain site placement before a single permit is filed.[6] Pulling a permit for a 30×40 garage triggers review well beyond the structural frame: zoning restrictions, property-line setbacks, drainage, easements, and HOA covenants are all evaluated alongside your construction drawings.[7] Skip that approval and the structure can't be insured — and a future property sale becomes complicated.[6] Garage slabs fall under code jurisdiction too: most authorities require a minimum four-inch concrete thickness, stepping up to five or six inches with steel mesh or rebar reinforcement when heavy vehicles are stored regularly.[7] For a practical state-by-state view of how permit timelines vary by jurisdiction, the warehouse addition permits roadmap breaks down approval requirements worth reviewing before you submit drawings.
Permit fees range from $150 in rural counties to $7,500 in major metro areas, with most 30×40 projects landing between $550 and $2,000 — a line item that belongs in your budget before any site work begins.[6]
Engineering the Frame for Load‑Bearing Efficiency
Frame type determines load-bearing capacity before a single bolt is set, so the structural decision needs to precede everything else in your 30×40 garage plans.
Pre-engineered metal buildings use red iron I-beam primary framing with secondary purlins and girts, custom-engineered to meet local codes for snow, wind, and seismic loads — which produces a cleaner permit path than light-gauge tubular buildings or pole barn alternatives.[8] Pole barn configurations rely on laminated columns (typically 3-ply 2×6 treated lumber) rather than solid 6×6 posts; solid posts can't be fully treated and develop internal rot over time, a structural liability when a column carries 40 feet of roof load.[9] Overhead door placement directly controls header sizing and load-bearing requirements — shifting a door from an end wall to a sidewall changes the structural math entirely, so door locations need to be locked in before the frame is engineered, not revised afterward.[9] For steel builds, maintain at least 2 feet of clearance between the top of the tallest door opening and the eave height; a 12-foot RV door requires a 14-foot eave minimum to preserve structural integrity above the opening.[8] Truss certification is where engineered performance separates from guesswork: trusses designed per ASCE 7 standards and verified by a third-party inspection service carry documented load capacity, while uncertified trusses from generic material packages skip that verification step entirely.[9] High-tensile steel panels specified at a minimum 80,000 PSI yield point resist hail and debris damage better than standard-gauge alternatives, and Galvalume-coated substrate extends panel life two to four times longer than galvanized steel.[9] For a detailed breakdown of how structural steel components interact at the system level — from primary frames to secondary members — the same load-path principles apply directly to a drive-through 30×40 configuration.
Integrating Insulation and Ventilation for Longevity
Metal conducts heat and cold far more readily than wood, which means condensation — not weather — is the primary threat to a 30×40 drive-through garage's long-term performance.[10] Moisture that forms on uninsulated steel panels corrodes fasteners, degrades stored equipment, and shortens the building's service life without any visible warning.
Proper insulation systems control interior temperature swings while blocking the condensation cycle that accelerates structural wear.[10] Your climate zone determines the R-value target: colder regions require higher thermal resistance ratings for both walls and ceilings, and if the garage will be heated, local codes typically specify the minimum insulation threshold the building envelope must meet.[7] Ventilation handles the half that insulation can't.
Most building codes require adequate airflow specifically to prevent carbon monoxide buildup from gas-powered vehicles and equipment — and for heated spaces, active ventilation also controls moisture before it migrates into insulation or wall cavities where it does invisible damage.[7] In a drive-through 30×40 layout, ridge vents, wall louvers, or powered exhaust fans need to be positioned to flush the full length of the building rather than exhausting only one end.[10] If you plan to heat the space, local codes may specify a minimum number of air changes per hour based on square footage — a spec that costs far less to meet during initial construction than to retrofit after the fact.[7] For a detailed look at how R-values and vapor barriers interact in steel structures, the steel building insulation guide covers the spec decisions worth locking in before your building ships.
Cost Management and Single‑Source Solutions
One accountable installation team working from shared drawings eliminates the scheduling gaps and change orders that typically inflate steel building projects by 15 to 30 percent.
Estimating Total Project Costs Using NSB's Cost Estimator
Leveraging ProTrades for Turnkey Installation Managing separate subcontractors for a 30×40 drive-through build — slab crew, steel erectors, door installers, electricians — means you own every scheduling gap, every miscommunication, and every change order that falls between them.
General contractors average $30 per hour nationally, with regional rates running from around $27 in Houston to $34 in Washington, D.C., and that spread compounds when multiple trades work on overlapping timelines without a shared schedule.[15] Labor and regional material costs can shift your total project cost by 15% to 30% depending on location and site conditions — a variable that only widens when coordination breaks down between independent crews.[14] ProTrades replaces that fragmentation with a single accountable installation team: vetted contractors experienced with pre-engineered steel who work from the same engineered drawings, under one point of contact, on one schedule.
The budget protection shows up in change orders: a well-defined plan with all trades aligned before groundbreak eliminates the unplanned additions that inflate costs mid-project.[15] Structural erection, electrical rough-in, and door hardware installation are not areas where non-specialized crews deliver savings — the cost of correcting installation errors consistently outweighs any labor budget reduction you'd achieve by going outside a vetted network.[15] For a practical framework on what separates qualified steel installation crews from general contractors bidding on metal building work, the local prefab contractor vetting guide outlines the five criteria worth verifying before any crew sets foot on your slab.
Reducing Expenses with Material Bundles and Market Monitoring
Kit packages ship everything together — primary framing, secondary members, wall panels, roof panels, and all fasteners — from a single manufacturing source, which eliminates the cost markup that compounds when you source components through intermediaries.[17] Building kit prices range from $15 to $25 per square foot for the package alone, and larger structures consistently price lower per square foot than smaller builds — a relationship worth tracking when you're comparing 30×40 garage plans against stepping up in footprint before locking in your order.[16] The market monitoring piece is straightforward but frequently skipped: steel prices fluctuate quarter to quarter, and getting at least four written competing quotes before committing to a supplier has proven to save buyers an average of 28% on total project costs.[16] That spread exists because kit pricing isn't standardized — two quotes for identical specifications can carry significant variance based on supplier overhead, regional material costs, and whether a manufacturer prices factory-direct or routes pricing through a dealer network.[18] Buying factory-direct closes that gap at the source, since manufacturers who ship direct don't carry dealer markup into the base price.[17] For a practical breakdown of which line items absorb the most variance across competing quotes on a 1,200 square foot build, the 30×40 metal build budget guide maps each component against typical market ranges.
The longer-term cost picture compounds the savings case: steel structures carry insurance premiums up to 40% lower than wood-frame alternatives and reduce HVAC costs by up to 60% when the building envelope is properly specified — which means the kit purchase price is only one layer of a multi-year cost equation, not the whole story.[16]
Customization and Future‑Proofing
Run electrical, plumbing, and HVAC rough-ins during construction when conduit costs a fraction of post-finish retrofit rates.
Adding Electrical and Utility Features to 30×40 garage plans
Electrical planning for a 30×40 shop comes down to mapping your power loads before conduit is run — not after equipment arrives and you're a circuit short.
A working shop with a lift, welder, and compressor needs at least two dedicated 220v outlets: one for the lift, one for the welder and compressor.[19] Both circuits belong in the rough-in phase while wall cavities are open and conduit runs cost a fraction of what post-finish work demands.[20] For the lift bay specifically, keep light fixtures and ceiling fans outside the lift footprint — plan for 12 to 14 foot eaves when a vehicle lift is in the picture, and any overhead obstruction inside that zone becomes a safety problem the moment a vehicle goes up.[21] Water utilities follow the same rough-in logic: run hot and cold lines for a utility sink during construction even if the fixtures install later.[19] Whether you're on municipal sewer or septic determines what drain options are practical — on septic, a floor drain that ties into the system requires a permit and typically a grease trap, so a utility sink with a standpipe handles washing and detailing work without that added compliance layer.[19] HVAC is the one utility most owners add post-construction: a mini-split handles 1,200 square feet without the roof penetrations and ductwork a forced-air system demands through a steel assembly.[19] For owners pairing a shop build with a 30×40 metal building with living quarters, the same rough-in sequence applies — plumbing, electrical, and HVAC stubs set during framing cost far less than cutting through finished walls later.
Spec every utility stub during initial construction; the incremental cost is minimal, and the alternative is paying retrofit rates on work that should have been done on day one.
Designing for Expandability and Multi‑Purpose Use
The single decision that preserves all future options costs nothing at order time: specify expandable end walls when you submit your order.[23] Steel structures extend in length by adding a frame line to the existing end — a 20-foot addition requires no changes to the primary sidewall framing, only the new bay attaching at the load-bearing end.[22] Miss that spec and a future extension forces you to demolish and reconstruct the end wall, converting a straightforward bay addition into a full structural and permit event.
The clear-span interior — 1,200 square feet with no interior columns — means the same footprint reconfigures freely between uses: vehicle storage one season, partitioned workshop the next, full open floor the season after.[23] Vertical space works the same way: wall heights from 10 to 25 feet and an optional mezzanine loft let you capture overhead square footage when floor space gets committed to active use.[23] Multi-purpose versatility is where the 30×40 earns its keep beyond a single application — residential storage, farm equipment protection, small business operations, and workshop functions all run from the same footprint without structural modification.[24] For the structural mechanics of attaching a new bay to an existing frame without compromising the original build, adding bays to steel buildings covers the tie-in sequence worth reviewing before your expansion permit is filed.
Maintaining Quality with Ongoing Service Support
Steel garages routinely last 30 to 50 years — but that lifespan is earned through consistent upkeep, not guaranteed by the material alone.[26] The annual maintenance routine is short: inspect fasteners for rust or loosening, scan wall and roof panels for dents, hail damage, or surface corrosion, and address any coating breach before moisture migrates into the base metal.[26] Problems caught in year two cost a fraction of what compounded damage runs in year ten.
Warranty coverage provides the structured version of that protection, and the architecture of the warranty matters as much as its existence.
Look for at least three tiers: a workmanship warranty covering installation-based defects in the first year, a paint warranty confirming enamel coatings won't chip or peel for at least ten years, and a rust-through warranty backing base panel integrity for 20 years.[27] Each tier maps to a distinct failure mode — installation error, coating breakdown, and base metal corrosion — so a warranty missing any one layer leaves a documented exposure gap that no inspection schedule can close.[27] The third support layer is documentation: certified, engineer-reviewed drawings shipped with your building kit serve as the permanent record of what was constructed and to what code standard.[25] When a question about load capacity, a permit for a future bay addition, or an insurance adjustment surfaces years after your drive-through 30×40 is operational, those drawings are what make the answer fast and definitive rather than expensive and speculative.[25]
- Drive-through configuration with opposite-end doors eliminates backing maneuvers and maximizes vehicle throughput in 30×40 spaces.
- Door placement must be finalized before structural engineering; shifting doors later changes load-bearing requirements and header sizing.
- Plan three distinct zones–perimeter shelving, fixed workbench, and clear center lanes–to protect floor space for active vehicle movement.
- Building codes require permit approval for zoning, setbacks, drainage, and structural loads before construction; skip permits and insurance becomes unavailable.
- Pre-engineered metal buildings with certified trusses and Galvalume coating outperform wood alternatives in load capacity, durability, and long-term cost efficiency.
- Condensation–not weather–is the primary threat; proper insulation and ventilation prevent corrosion and moisture damage in steel structures.
- Specify expandable end walls at order time to enable future bay additions without demolishing existing end-wall framing.
- https://blog.eb3construction.com/construction/automotive/commercial-garage-construction-plans/
- https://www.buyabp.com/how-to-design-the-perfect-backyard-workshop-in-florida
- https://www.buildingsguide.com/products/garages/30x40x14-drive-through-garage/?srsltid=AfmBOooAogWxLVbYP09nr-Y9oy3sswoHTlyeUbQitQwurMcmpckIly_G
- https://www.americanmetalbuildings.com/blog/24×36-metal-garage-layouts-3-plans-that-work/?srsltid=AfmBOopcJs0MaRcb-9imZP2Q2CRZNgyb4BnAbdHG6JQ6MYTepALLDgpw
- https://www.americanmetalbuildings.com/blog/30×40-vs-40×60-steel-buildings-real-space-cost-value-and-the-best-fit-for-you/?srsltid=AfmBOooByS2dy_nKldioqwlyYbuwr4cghEfFaTvFReCLwZRvf0im5pZg
- https://www.buildingsguide.com/build/metal-building-codes-permits/?srsltid=AfmBOorRl24tkNkw-Dfpc9c9PkmaVzfEXdwVvLMo8uk1mOziQ3EXAZmX
- https://trusscore.com/blog/garage-building-code-requirements-you-need-to-know.html
- https://www.buildingsguide.com/products/standard-size/30×40-metal-building/?srsltid=AfmBOooyfosVqm9ymBvq-S9DODAqQSrWmVDoUrPBjoL07_ZwbBEWAMht
- https://info.fbibuildings.com/blog/30-x-40-pole-barn-costs-diy-kits-vs.-construction
- https://metal-america.com/30×40-metal-building-construction-facts/
- https://www.steelcobuildings.com/how-much-does-a-30×40-steel-building-cost-in-2026/
- https://www.buildingsguide.com/metal-building-prices/?srsltid=AfmBOopoVZ2Yd8QJ_VuvujAyEWo_yzgok7y_61fJ4aHRRQmQ-bbYJ37r
- https://homeguide.com/costs/cost-to-build-a-garage
- https://trusscore.com/blog/how-much-does-it-cost-to-build-a-garage.html
- https://alansfactoryoutlet.com/blog/garage-conversion-cost/?srsltid=AfmBOorgVNkUjMPdkMOXnD40vF4vg_o_49fbLCS7RtEzseZdXlGTwdim
- https://www.buildingsguide.com/metal-building-kits/?srsltid=AfmBOoqOPiNw1PzE731FA7fcj3uGtcmeRbpgTf1TanA_sEcYNZfH2C2M
- https://www.worldwidesteelbuildings.com/steel-building-kits/
- https://steelbuildingkit.com/steel-building-kits-the-complete-guide-to-cost-companies-and-best-options-in-2025/
- https://www.garagejournal.com/forum/threads/building-a-new-house-w-attached-30×40-garage-shop-suggestions-and-recommendations-please.484875/
- https://ilovepolebuildings.com/how-to-plan-electrical-systems/
- https://www.aametalbuildings.com/blog/picking-the-right-metal-garage-size-from-12×20-to-40×60?srsltid=AfmBOop8Ps2Hce-YYVlL7f8qLrLCmpT6RhcNrhIvIWE9aBSq7Ni-kDsx
- https://bulldogsteelstructures.com/blog/the-ultimate-guide-to-building-a-30×40-metal-structure-costs-design-and-more/
- https://www.buildingsguide.com/standard-sizes/?srsltid=AfmBOoqwiQFK2-1fweOWtXHlTy5mOz89V-XfuElxf4pID3kxPwvz3fK2
- https://torosteelbuildings.com/
- https://torosteelbuildings.com/steel-building-types/garages/
- https://bulldogsteelstructures.com/product-category/garages/
- https://metalgaragecentral.com/metal-garages-with-living-quarters