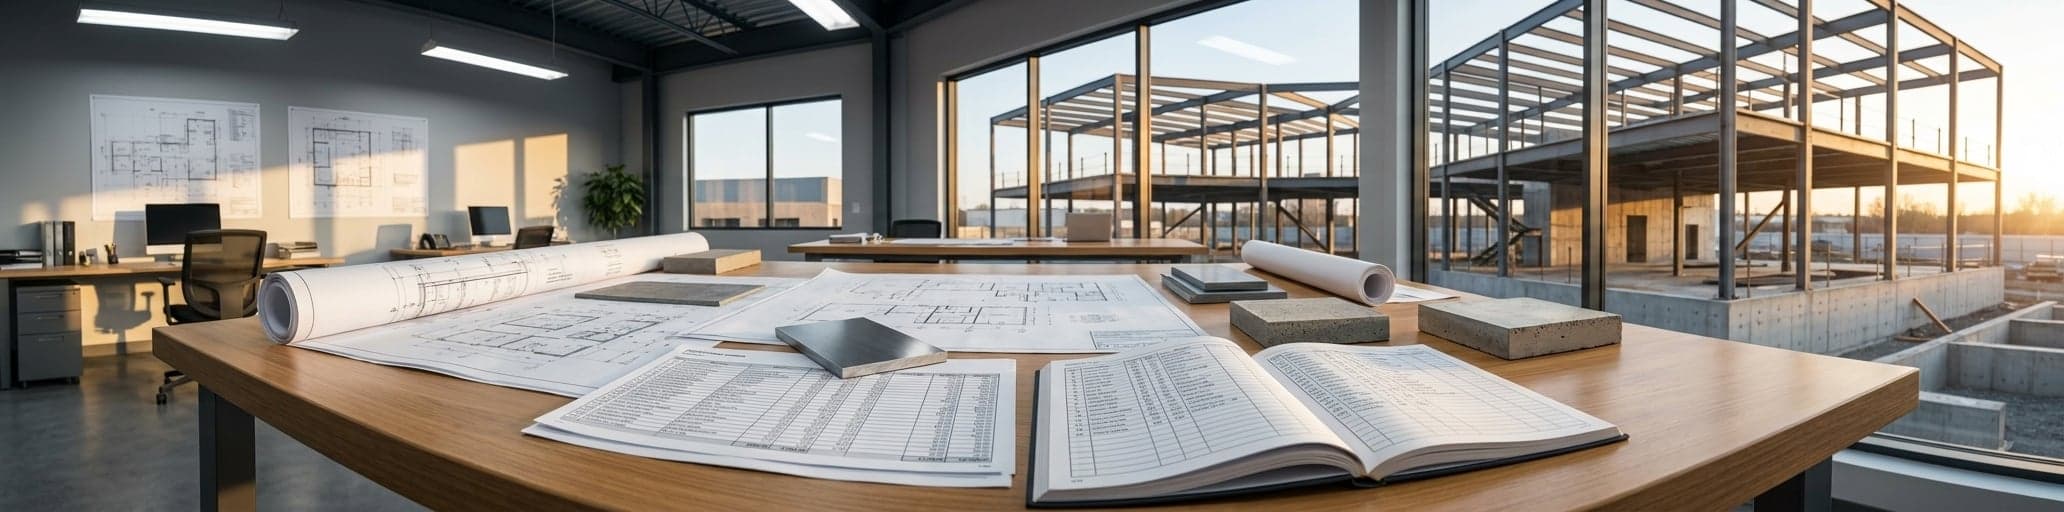

We break down every cost category in a 20×40 metal building project–from the steel kit and foundation to permits, insulation, and optional upgrades–so you understand where your budget goes before ordering. Sourcing from a single supplier, ordering during off-season, and locking in specifications early protect you from hidden costs and coordination delays that erode savings.
Understanding the 20×40 Metal Building Cost Landscape
A 20×40 metal building kit runs $7,000-$12,000 depending on steel grades and your region's wind and snow load requirements, making it roughly $15-$20 per square foot.
Base Structure and Materials
The base 20×40 metal building cost covers four components in a standard kit: primary I-beam framing, secondary framing (purlins and girts), wall sheeting, and roof panels.[2] That kit typically runs $7,000-$12,000, with steel market conditions at the time of your order setting the final number.[1] Material grade accounts for a meaningful share of that spread–galvanized steel outlasts standard-grade steel in corrosive environments like farms, coastal sites, or high-humidity warehouses, but it costs more per linear foot, so match the spec to your actual operating conditions before committing.[1] Your kit is also engineered to local wind and snow loads, which means two identical 20×40 footprints quoted in different states can land at different prices because the framing must meet each region's structural requirements.[2] At roughly $15-$20 per square foot for the raw kit, this footprint is one of the more cost-efficient entries into pre-engineered steel construction.[3] Straight-wall designs stay at the lower end of that range–simpler fabrication and predictable material quantities reduce waste and speed assembly compared to arched alternatives, keeping your budget tighter from day one.[1] Knowing how structural steel components are specified lets you compare competing quotes line by line and catch grade substitutions before they become field problems.
Site Preparation and Foundations
Foundation work accounts for 15-20% of your total 20×40 metal building budget, making it the second-largest cost category after the steel kit itself.[4] The standard choice is a 4-inch concrete slab at $3-$5 per square foot–a total of $2,400-$4,000 for the full 800-square-foot footprint–which handles cars, light trucks, and typical workshop equipment without issue.[5] If your operation involves RVs, heavy farm machinery, or commercial-grade loads, step up to a 6-inch pour instead: that runs $8-$12 per square foot but delivers the load capacity those uses actually demand.[5] Concrete mix specification matters just as much as thickness–2,500 PSI suits most residential applications, while 4,000 PSI is the right call for heavier commercial or agricultural work.[5] Rebar or wire mesh reinforcement is non-negotiable at either spec; it stops cracking and adds years to your floor's service life.[5] Site prep itself–clearing, grading, and leveling–adds $800-$2,000 before a single truck of concrete arrives, and poor soil conditions or deep frost lines can push both figures higher.[5] Local codes sometimes require deeper footings based on soil bearing capacity and frost depth, so verify those requirements before locking in your slab budget.[5] The same thickness and PSI trade-offs apply at similar footprints; our 30×40 concrete slab cost breakdown shows exactly how those decisions interact with total project cost.
Permits, Engineering, and Inspections
Permits, engineering reviews, and inspections are the line items that most 20×40 metal building cost estimates leave off the summary page–until closing.
Permit fees run $200-$1,200 depending on your jurisdiction and total project value, and the process confirms that your building clears local zoning setbacks, safety standards, and occupancy requirements before construction begins.[4] Local regulations can also dictate which foundation type your site requires and which material standards apply, so your permit application directly shapes decisions you may have thought were already locked in.[6] The engineering piece typically comes bundled with your kit: manufacturers produce stamped plans calibrated to local wind and snow loads once you provide your location data, but some jurisdictions layer on an independent engineering review that adds another $300-$800 to your permit costs.[4] Build without permits and the exposure is serious–daily fines once violations are discovered, potential removal orders, insurance coverage denial, and title complications when you eventually sell.[4] Rural property owners sometimes assume an agricultural exemption covers their build, but verifying that exemption before breaking ground is the only safe move; assuming it applies and being wrong costs multiples of the permit fee.[4] Electrical connections and structural tie-ins frequently require licensed contractors under local code regardless of who installs the rest of the structure, so identify those trade-specific requirements at the budgeting stage, not during construction.[4] For projects crossing state lines or sitting in jurisdictions with multi-agency approval chains, the state-by-state permit roadmap for warehouse additions shows how layered approvals affect your timeline and what to prepare at each stage.
Breaking Down the Major Expense Categories
Frame type and steel gauge drive most of the $12,000 spread in metal building shell costs, so matching specifications to your actual load requirements keeps you within budget.
Steel Frame and Panel Costs
The steel framing and panels together represent the largest single line item inside a 20×40 metal building cost quote, and the spread within that line item is wide enough to change your total budget materially. The metal building shell–structural framing plus wall and roof panels–runs $25-$40 per square foot before site work, foundation, or interior finishes are added.[7] For an 800-square-foot footprint, that translates to a shell cost of $20,000-$32,000 depending on spec choices.
Two variables drive most of that spread: frame type and steel gauge. Rigid I-beam construction, the commercial standard, delivers true clear-span capability with no interior columns interrupting your floor plan–critical for farm equipment, aircraft, or commercial storage–but it costs more than lighter tubular or post-frame alternatives.[8] Heavier gauge steel panels handle higher wind and snow loads but add to the package price; matching gauge to your actual load requirements rather than defaulting to the heaviest available spec keeps you within budget without compromising structural integrity.[8] Suppliers who use commercial-grade I-beam frames manufactured domestically will quote higher than those sourcing tubular offshore product, and that difference shows up in long-term performance and code compliance, not just upfront price.[9] When comparing quotes line by line, confirm whether each bid specifies rigid frame or post-frame construction and what gauge the panels carry–those two details explain most price variation you'll see across competing proposals.
For a deeper look at how hot-rolled versus cold-formed framing affects both cost and load performance, the steel frame construction breakdown lays out the trade-offs in plain terms.
Roofing, Insulation, and Weatherproofing
The roof panel decision shapes both your upfront cost and your maintenance schedule for years after installation. Vertical roof panels shed water and snow efficiently–the right call for regions with heavy precipitation or significant seasonal snow accumulation–while horizontal panel configurations cost less initially but collect debris and require more attention over time.[4] Metal roofing runs $9-$24 per square foot installed, and the final number moves based on panel profile, steel gauge, and whether existing decking conditions or ventilation gaps require correction before installation begins.[10] On an 800-square-foot footprint, committing to the right profile at the quoting stage prevents mid-build changes that push your installed cost past budget.
Steel conducts heat 400 times faster than wood, so an uninsulated 20×40 metal building swings between temperature extremes that make it unusable for most applications beyond basic cold storage.[11] Vinyl-faced fiberglass blanket insulation is the industry standard for steel buildings: it runs $0.90-$1.00 per square foot wholesale at R-19–the most widely ordered spec for walls and roof across most U.S. climate zones–compared to double or triple that cost for closed-cell spray foam installed.[11] For mild-climate walls or unheated agricultural and storage use, R-13 material brings the cost down further; conditioned workshops and cold-climate buildings step up to R-25 walls and R-30 ceilings to reduce heating and cooling load.[11] On an 800-square-foot building, R-13 insulation delivers combined monthly energy savings averaging $84 in heating and cooling costs, with a payback period of roughly 14 months on the insulation investment–and it absorbs sound from rain, machinery, and ambient noise that bare steel panels amplify throughout the interior.[4] The steel building insulation guide breaks down R-value selection and vapor barrier specs by climate zone if you want to pressure-test your spec before ordering.
Condensation is the weatherproofing cost most owners don't budget for until rust appears on framing members. When warm, moist interior air contacts cold steel panels, moisture forms on the metal surface–a cycle that drives corrosion, mold growth, and structural damage if left unaddressed.[11] Vinyl-faced fiberglass insulation with a vapor retarder stops the cycle by preventing warm air from reaching cold steel; properly taped seams at purlin overlaps complete the barrier.[11] Buildings in humid coastal environments, working farms, or high-humidity shops–the applications a 20×40 footprint handles most–need this system in place before first occupancy rather than as a retrofit after damage has already compounded.[11]
Doors, Windows, and Access Points
sit outside base kit pricing–each is quoted as a separate add-on, and the combination you choose directly shapes your total 20×40 metal building cost.[12] A typical 20×40 build pairs two overhead garage doors with a single walk-in entry door, covering standard workshop, storage, and light commercial access without overbuilding for the footprint.[13] Both the count and the opening dimensions are yours to define: you select door and window sizes along with their positions on the structure before fabrication begins, so the access layout reflects your actual workflow rather than a manufacturer default.[13] Windows are a separate charge per opening, adding natural light and cross-ventilation but incrementing the line item total each time one is added to the plan.[12] Pinning down your exact configuration–overhead door quantity, clear-height requirement, walk-in door placement, and window count–before the order goes to production is the most cost-effective move you can make.
Changes after fabrication starts cost more in rework time and materials than resolving the layout at the quoting stage.
For a broader look at how access points and other add-ons interact with kit pricing across larger footprints, the 40×80 metal building kit pricing guide maps what's optional at quote versus what becomes essential once construction begins.
Optional Add‑Ons and Value‑Driven Upgrades
Insulation, electrical, and interior finishes typically run $5,500-$22,000 beyond your kit price, but they transform a shell into a genuinely usable workspace.
Interior Finishes and Utilities
are where a 20×40 metal building shell becomes a functional, occupied workspace–and where your budget needs a separate line item from the kit quote. Insulation runs $1,500-$6,000 and electrical wiring with lighting adds another $2,000-$8,000; office build-outs, plumbing, and HVAC carry variable costs depending on fit-out complexity.[14] For workshops, repair bays, or any year-round occupied use, none of those line items are truly optional–they determine whether the space is usable.[14] On the insulation side, fiberglass batting is the most cost-accessible choice: it installs quickly, adheres directly to steel framing, and comes in enough thickness options to match most U.S. climate zones.[15] Rigid board insulation–polyurethane panels cut to fit around purlins and girts–suits higher fire-risk environments like welding shops without sacrificing R-value.[15] Spray foam seals every gap and bonds directly to the steel surface, eliminating air pockets that undercut other systems, but it requires professional installation and carries the highest per-square-foot cost of the three methods.[15] Electrical service planning starts with one question: what load are you actually running?
A direct feed from your main panel handles basic lighting and a few utility outlets in a day or two; higher-demand operations with multiple tools or a dedicated sub-panel require a licensed electrician to size the circuit and complete the final panel connection.[15] Finishing the interior with paint means cleaning the steel thoroughly, removing any rust or loose material, priming every bare metal surface, and then applying acrylic or oil-based topcoat–latex formulations chip too quickly on steel to justify the lower upfront cost.[15] For owners considering a finished office area or hybrid shop-and-workspace layout, the 30×40 metal building with living quarters guide shows how partition placement and utility routing interact with total fit-out cost. Locking in partition locations, conduit routes, and insulation type before fabrication begins is almost always cheaper than retrofitting any of those elements after the shell is standing.[15]
HVAC and Energy Efficiency Systems
Climate control in a 20×40 metal building is where operating costs either stay manageable or compound–and the decision comes down to matching equipment to actual use patterns before purchasing anything.
A well-insulated 800-square-foot shell dramatically reduces the HVAC load, meaning the heating or cooling unit you install runs fewer cycles and lasts longer; strategic insulation investments pay for themselves through reduced utility costs within 2-4 years, so the equipment running on top of a tight envelope is working with the building instead of against it.[4] LED lighting reduces electrical consumption by 65-75% compared to traditional fixtures, and the compact footprint of a 20×40 structure means you reach adequate illumination with fewer fixtures–keeping the upgrade cost low relative to the savings it delivers over time.[4] Adding motion sensors to those LED fixtures eliminates wasted electricity when the building sits unoccupied, a practical move for workshops, repair bays, and agricultural storage facilities that see intermittent traffic rather than continuous occupancy.[4] Owners who want to push energy performance further–and capture the tax deductions tied to ASHRAE 90.1 compliance–will find the full compliance and deduction roadmap in the energy-efficient metal buildings guide, which maps exactly where a steel structure needs to land to qualify.
Security, Lighting, and Automation
Security adds real value to a 20×40 build at a cost most owners underestimate until something worth protecting is inside.
Galvanized steel doors–both walk-in and roll-up configurations–resist moisture, rust, mold, pests, and fire, making them a more durable barrier than wood alternatives at lower long-term cost.[16] For sites in higher-crime areas or remote agricultural locations, the combination of a steel shell and steel doors creates a physical deterrent that keeps equipment, inventory, and vehicles protected without requiring a dedicated alarm budget as a first line of defense.[16] Roll-up overhead doors go a step further by preserving interior square footage compared to swing-out alternatives–a practical gain when the footprint is 800 square feet and every usable foot counts.[16] On the lighting side, skylights reduce daytime electrical load without adding mechanical components that can fail; each unit replaces a standard roof panel during installation, making it cheaper to include during the build than to retrofit after the shell is standing.[18] Motorized door operators suit high-frequency access points well, but occasional-use buildings–agricultural storage, equipment bays, seasonal operations–often get more value from manual systems with fewer moving parts and lower maintenance exposure over time.[16] Lock in conduit routing and any automation hardware placement before erection begins; retrofitting electrical runs after the steel shell is up costs materially more in labor than routing them once during construction.[17]
Maximizing Value Through Single‑Source Solutions and Smart Planning
Choosing a single-source supplier who handles your entire project eliminates coordination gaps, keeps costs transparent, and removes the management burden from your schedule.
Choosing the Right Supplier for Quality and Service Excellence
The single variable that separates a smooth 20×40 metal building cost experience from a costly one is who you source from–and the gap between suppliers is wider than most buyers expect. Suppliers using commercial-grade steel I-beam frames manufactured in North America quote higher than those sourcing tubular offshore product, and that difference shows up in long-term performance and code compliance, not just the initial line item.[19] Before committing to any quote, ask how long the supplier has been in business, request references from comparable projects, and confirm whether the company has experience with your specific building type–a workshop, agricultural facility, hangar, or commercial shell each carries different engineering and code requirements.[20] Trustworthy suppliers answer those questions directly; a manufacturer that deflects or can't produce references from similar builds is a red flag regardless of price.[20]
Location matters more than most buyers factor in. The closer the supplier's facility to your job site, the lower your shipping costs and the faster the project moves–and if last-minute changes or accessories are needed mid-build, proximity makes the difference between a one-day fix and a multi-week delay.[20] Beyond proximity, look for a supplier whose warranty covers local building code compliance for the lifetime of the structure, not just the delivery date.[20] Managing a 20×40 metal building project across multiple vendors–separate contractors for site work, foundation, erection, utilities, and inspections–consumes more of your time than most owners budget for, and coordination gaps between those parties generate change orders that erode every dollar you saved on the kit.[7] A single-source supplier who oversees the full scope keeps everyone aligned, factors hidden costs into the budget from the start, and removes that coordination burden from your schedule entirely.[7] For a practical framework on vetting local contractors before signing anything, the NSB prefab contractor vetting guide walks through the five questions that separate qualified builders from expensive mistakes.
Cost‑Saving Strategies and Right‑Sizing
Two timing and sourcing decisions deliver the most predictable savings on a 20×40 metal building cost without touching your structural spec. Placing your order during November through February–when manufacturer workloads drop–unlocks discounts of 8-12% from most suppliers, a reduction that compounds meaningfully on a project in the $24,000-$40,000 installed shell range.[4] Separating the kit purchase from installation adds another $2,000-$4,000 in savings: buying the kit directly and contracting local labor for foundation and erection keeps both line items competitive, whereas turnkey packages bundle those costs into a single margin.[4] On the customization side, standard colors from the manufacturer's 12-18 color palette cost nothing extra; upgrading to a premium or custom-matched finish adds $600-$1,000 without changing structural performance–a clear candidate to cut if the budget is tight.[4] Accessories and add-ons as a category carry the highest budget risk of any phase: collectively, they can increase total project cost by 20-30% when selected without a firm use case driving each choice, so treat every optional line item as a deliberate decision rather than a default.[21]
Right-sizing is where most owners either protect their budget or quietly erode it. The 20-foot width handles the most common applications–two vehicles end-to-end, a complete small workshop, or dedicated equipment storage–without requiring the additional investment of a 24×40 footprint unless side-by-side parking is a hard requirement.[4] Standard 8-10-foot wall heights suit the majority of residential and light commercial builds; each additional foot of clearance adds $400-$800 to the kit price, making RV and boat storage the clearest cases where stepping up to 12-14-foot walls is cost-justified rather than speculative.[4] The rectangular footprint naturally divides into functional zones–front 20-25 feet for vehicle access, rear 15-20 feet for dedicated workspace or storage–so disciplined layout planning extracts full utility from the 800 square feet before any structural additions are on the table.[4] For owners weighing whether a larger footprint changes the math enough to justify the step-up, the prefab buildings cost and speed guide breaks down how per-square-foot pricing shifts as dimensions increase, giving you a concrete basis for that decision before the order goes in.[21]
Timeline Management and Clear Communication
Your 20×40 metal building kit is a long-lead item–shop drawings must be reviewed and approved before fabrication begins, and that approval window occurs before your supplier's stated lead time even starts.[22] Rushing or skipping that step doesn't compress the schedule; it delays the entire sequence and can force expedited fabrication or air-freight shipping that costs more than the price difference you saved on the original order.[22] Industry data puts average construction delays at 46.8 days across an entire job–a 117% increase from 2021–with supply chain bottlenecks, design documentation gaps, and communication breakdowns between owners, contractors, and suppliers driving the majority of preventable slippage.[24] Communicating realistic timelines with every party from the first conversation keeps your project's reputation intact when material conditions tighten.[24]
The most effective scheduling discipline you can apply is maintaining one procurement record–approved drawings, confirmed lead times, delivery windows–that every party on the project accesses in real time.[22] When your site contractor, concrete sub, electrician, and steel supplier are all working from the same current data, the coordination gaps that generate change orders disappear before they become line items.[22] Delays in construction projects typically add 2-20% to overall project costs depending on severity, and most of that exposure comes from siloed teams reacting late rather than aligned parties catching variance early.[23] For a 20×40 metal building cost budget, a two-week erection standby while waiting on late panels burns labor, risks permit expirations, and erodes the savings built into your off-season kit order. You can see exactly how fabrication sequencing and delivery phases unfold–and where approval windows fall in the calendar–in the prefab building kit delivery timeline breakdown, which maps each phase from order placement to on-site delivery.
- Base 20×40 metal building kits cost $7,000-$12,000; total installed shell runs $20,000-$32,000 depending on steel grade and frame type.
- Foundation work accounts for 15-20% of total budget; 4-inch concrete slab costs $2,400-$4,000, while 6-inch pour handles heavy equipment loads.
- Permits, engineering reviews, and inspections often omitted from quotes but cost $200-$1,200; skipping permits risks fines, removal orders, and insurance denial.
- Insulation is essential for usability: R-19 fiberglass costs $0.90-$1.00 per square foot and pays back in 14 months through energy savings.
- Single-source suppliers eliminate coordination gaps between contractors; multi-vendor projects generate 20-30% in unexpected change orders and delays.
- Order during November-February for 8-12% discounts; separating kit purchase from installation saves another $2,000-$4,000 without compromising structure.
- Accessories and add-ons can inflate total cost by 20-30%; lock in door configurations, insulation type, and electrical routing before fabrication begins.
- https://www.uspatriotsteel.com/blog/how-much-does-a-20×40-metal-building-cost/
- https://gensteel.com/steel-building-kits/base-building-packages/20×40/
- https://www.buildingsguide.com/metal-building-prices/?srsltid=AfmBOoomjRgUVPOUDZqCwI_vPb7h55zRq3PpQnbNXR_F9BQ3e2KM8FLC
- https://www.metal-buildings.org/20-x-40-metal-building/
- https://bullbuildings.com/the-versatility-of-a-20×40-metal-garage/
- https://homeguide.com/costs/metal-building-cost
- https://builtmammoth.com/how-much-does-a-steel-building-cost/
- https://www.steelstructuresamerica.com/metal-building-cost/
- https://www.buildingsguide.com/metal-building-prices/?srsltid=AfmBOorPxIKHwny7q5w2JnLWHTzob4PnQGUmYrIhUgVoAGGxioAVeR6S
- https://paccsolutions.com/blog/metal-roof-cost-per-sqft/
- https://www.factorysteeloverstock.com/insulation-metal-building-insulation/
- https://alansfactoryoutlet.com/metal-building-prices/?srsltid=AfmBOoo00O5fQMepp-lkW3LGMJvvJ3Fkp6l8H8-Ad93ElPcur52UW1vn
- https://www.ebay.com/itm/134280676499
- https://www.vikingsteelstructures.com/metal-shop-building-prices?srsltid=AfmBOor7aQ_Sp4fcXAnNXiXirw7qjbUTrrLQ-zPjbTehz2iSm_4Zd5Rg
- https://www.bargainbarnsusa.com/how-to-convert-your-metal-building-into-your-dream-home
- https://www.coast-to-coastcarports.com/everything-you-need-to-know-about-choosing-the-right-doors-for-your-steel-building?srsltid=AfmBOopwLmIXgC_IMRxuQkOZEirod9ubNNlZF5cuMdQNgU4sL2LysFcH
- https://yourbuildingteam.com/metal-buildings/20×40-metal-buildings/
- https://www.archcore.com/metal-building-kit-prices/
- https://www.buildingsguide.com/metal-building-prices/?srsltid=AfmBOooT0jnirmb08PhYrFzoi6DCI315BDgPe4OoAExe6z09rEdHdqf3
- https://cdmg.com/building-faqs/how-to-choose-the-best-metal-building-supplier
- https://norsteelbuildings.com/steel-building-news-industry-trends/how-much-do-steel-buildings-cost/
- https://layer.team/blog/procurement-strategies-for-managing-long-lead-items
- https://www.planradar.com/us/manage-delays-construction/
- https://buildertrend.com/blog/materials-causing-construction-delays/